- STATUS: ACTIVE
- COMPATIBLE VERSION: 4.0
1. HOW DOES STRIPE WORK WITH REVO? 2. CREATE YOUR STRIPE ACCOUNT 3. ENABLE STRIPE IN PRODUCTION MODE 4. REVO SOLO 4.1 CONFIGURE STRIPE IN REVO SOLO 4.2 POLICIES IN REVO SOLO 4.3 PAYMENT WITH REVO SOLO 5. REVO XEF 5.1 CONFIGURE STRIPE IN REVO XEF 5.2 CHARGE THE ORDER WITH REVO XPRESS
Stripe is a platform that allows you to accept card payments on your online shop easily and quickly.
1. HOW DOES STRIPE WORK WITH REVO?
Stripe transfers the customer's money to your bank account. By linking your Stripe account to REVO, payments are processed automatically and recorded in REVO.
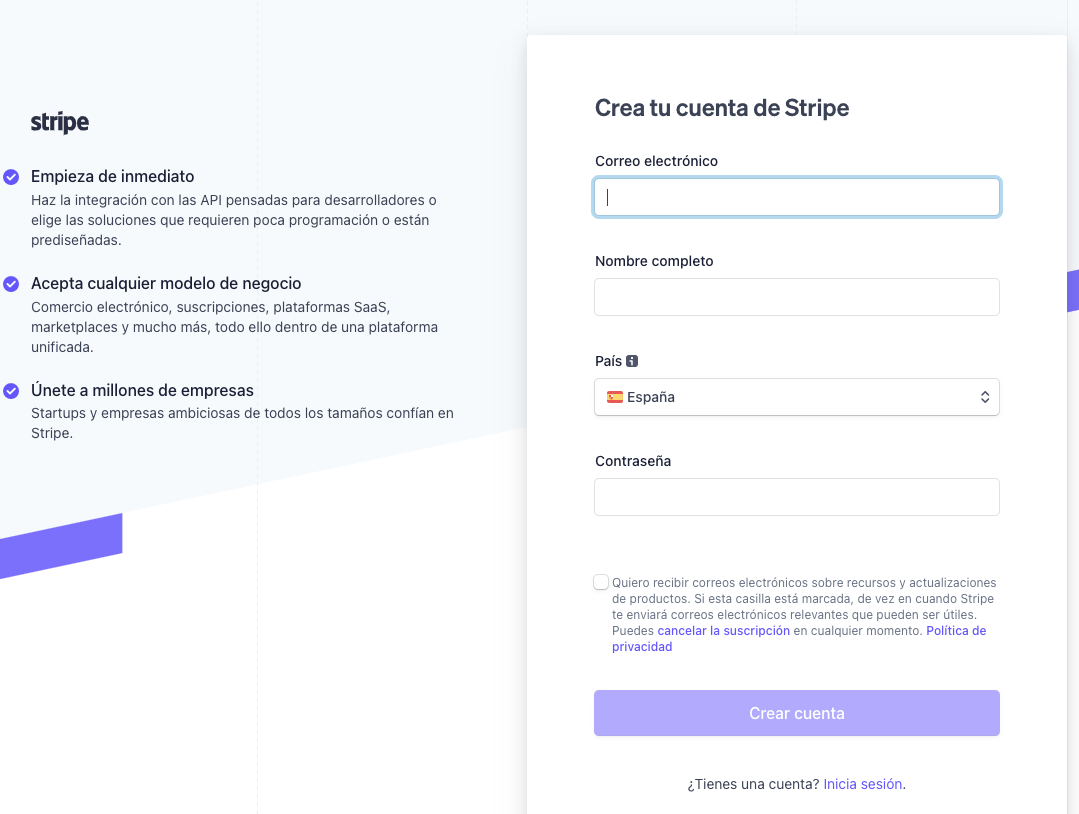
2. CREATE YOUR STRIPE ACCOUNT
To create a Stripe account, do it from here.
Sign up with Stripe via this link.
After creating your account and logging in:
1. Go to Developers.
2. Click on API keys.
3. Copy the secret key (Stripe key).
4. Copy the publishable key.
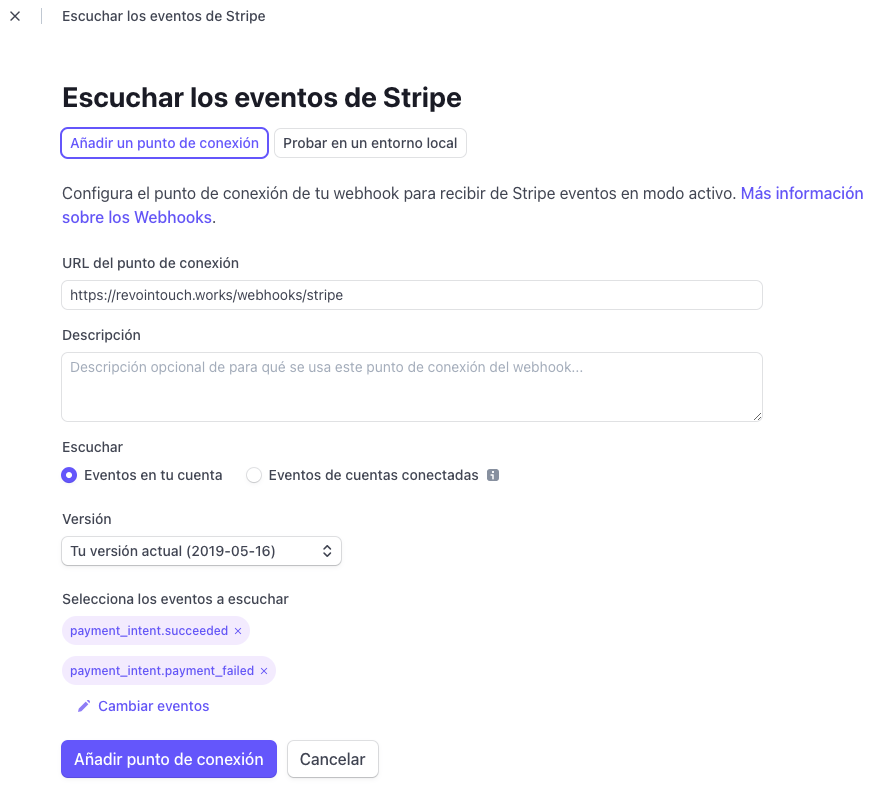
5. Go to Webhooks and click Add endpoint.
Fill in the information:
-
URL:
- For SOLO: https://revosolo.works/webhooks/stripe
- For XPRESS: https://xpress.revo.works/webhooks/stripe
-
Events to select: payment_intent.succeeded and payment_intent.payment_failed
Then click Add endpoint.
If you're using both SOLO and XPRESS, create a webhook for each.
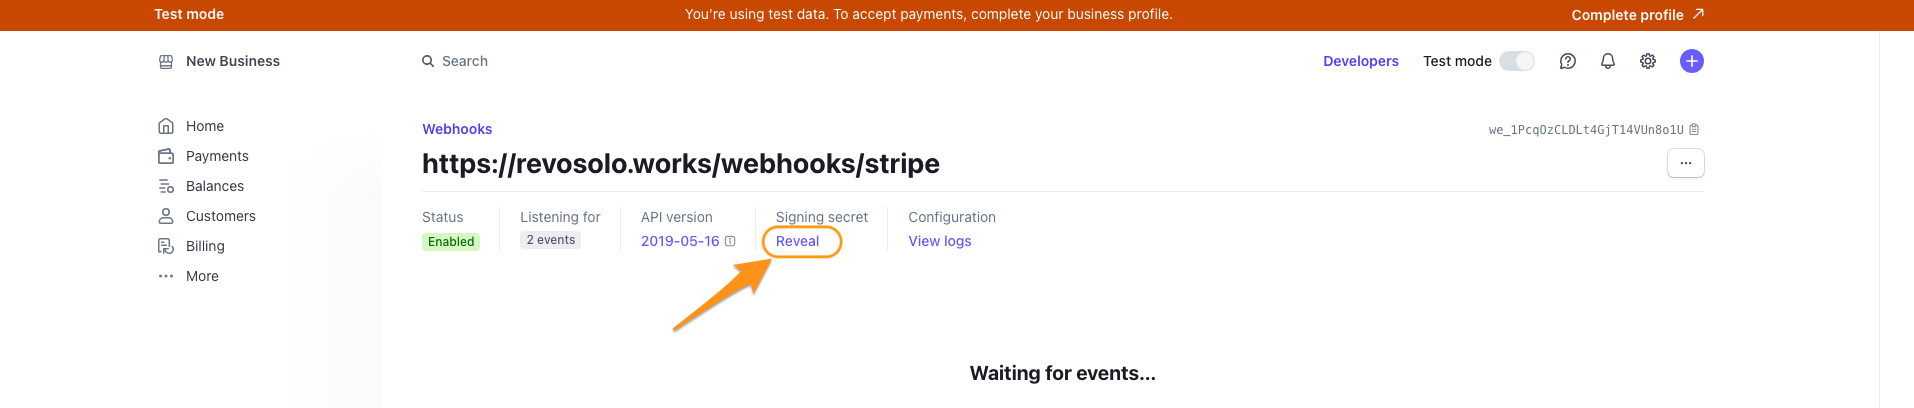
In the webhook, you'll see the Signing secret. Click "Reveal" and copy the key — this will be the webhook key:
3. ENABLE STRIPE IN PRODUCTION MODE
You'll see that Stripe is in test mode. To enable it, click Activate your account.
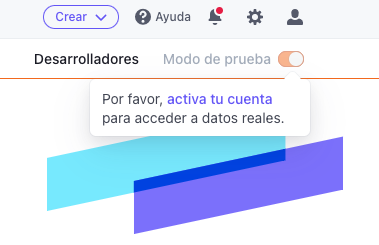
Fill in the data until the registration is complete.
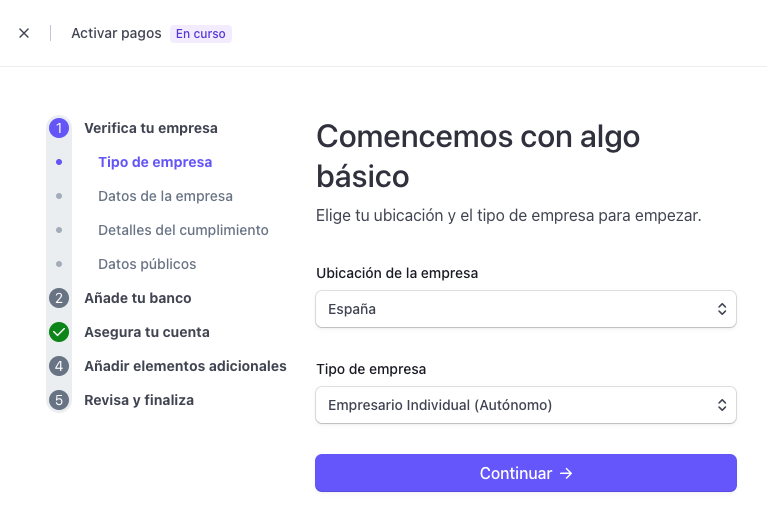
4. REVO SOLO
4.1 CONFIGURE STRIPE IN REVO SOLO
Make sure you have Revo SOLO configured.
1. Go to the back office of Revo SOLO.
2. Navigate to Configuration / PAYMENT GATEWAYS.
3. Click on + New and complete the fields:
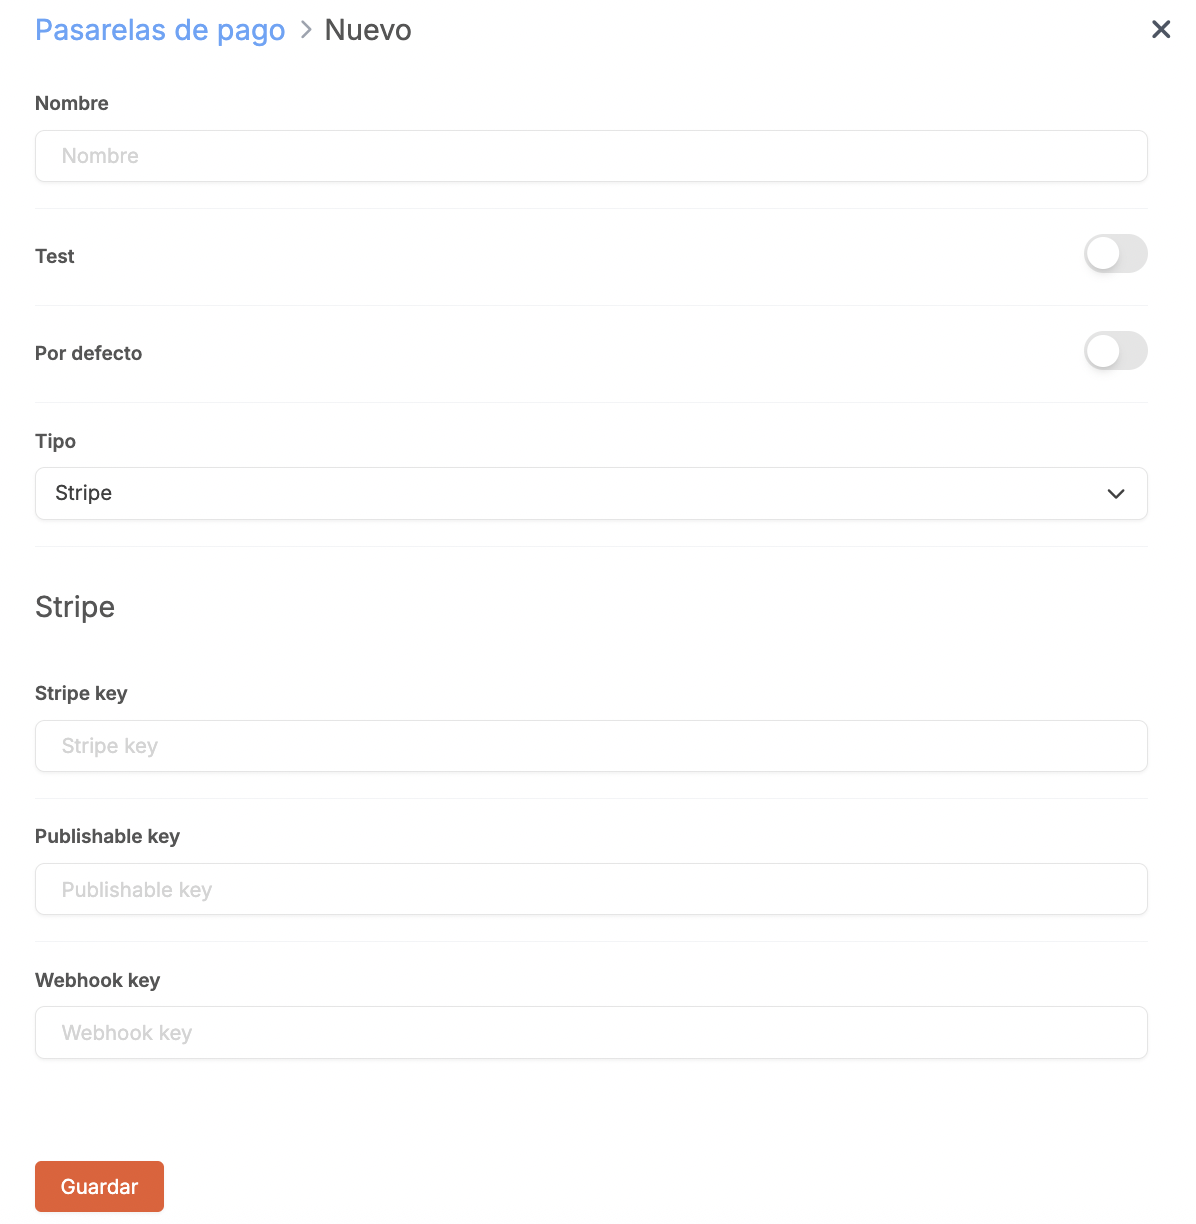
- Name: Identifier name
- Test: Disabled
- Default: Enabled
- Type: Stripe
- Secret key: Paste your Stripe secret key
- Publishable key: Paste your Stripe publishable key
- Webhook key: Paste your Stripe webhook key
4. Click Save.
Then assign this gateway to your site. Learn how to do that here.
4.2 POLICIES IN REVO SOLO
1. Go to Configuration > LEGAL DOCUMENTS.
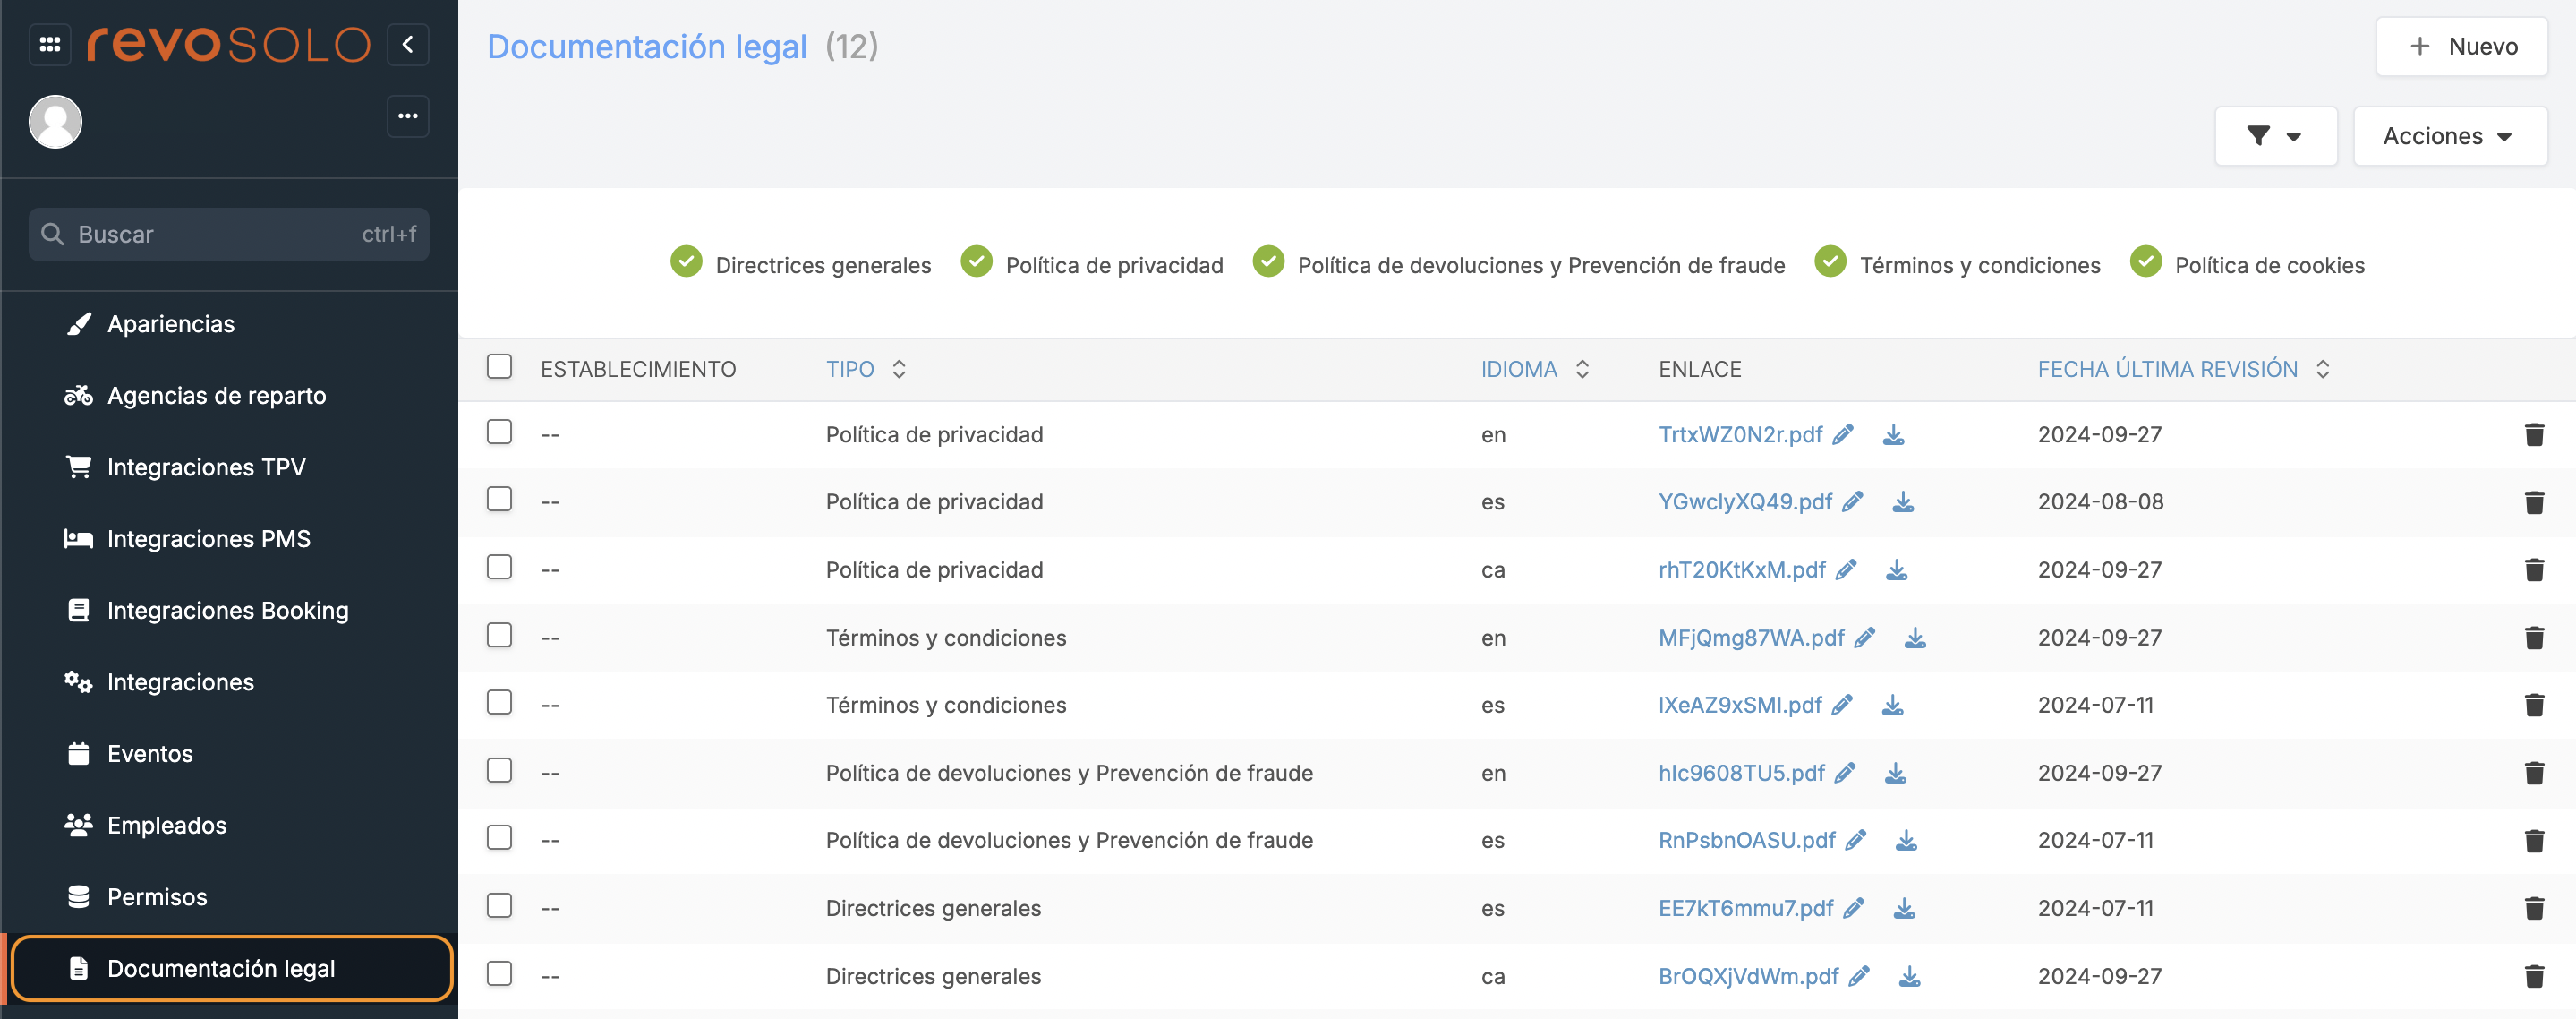
2. Click on + New, select type Refund policy, choose the language, and upload the file.
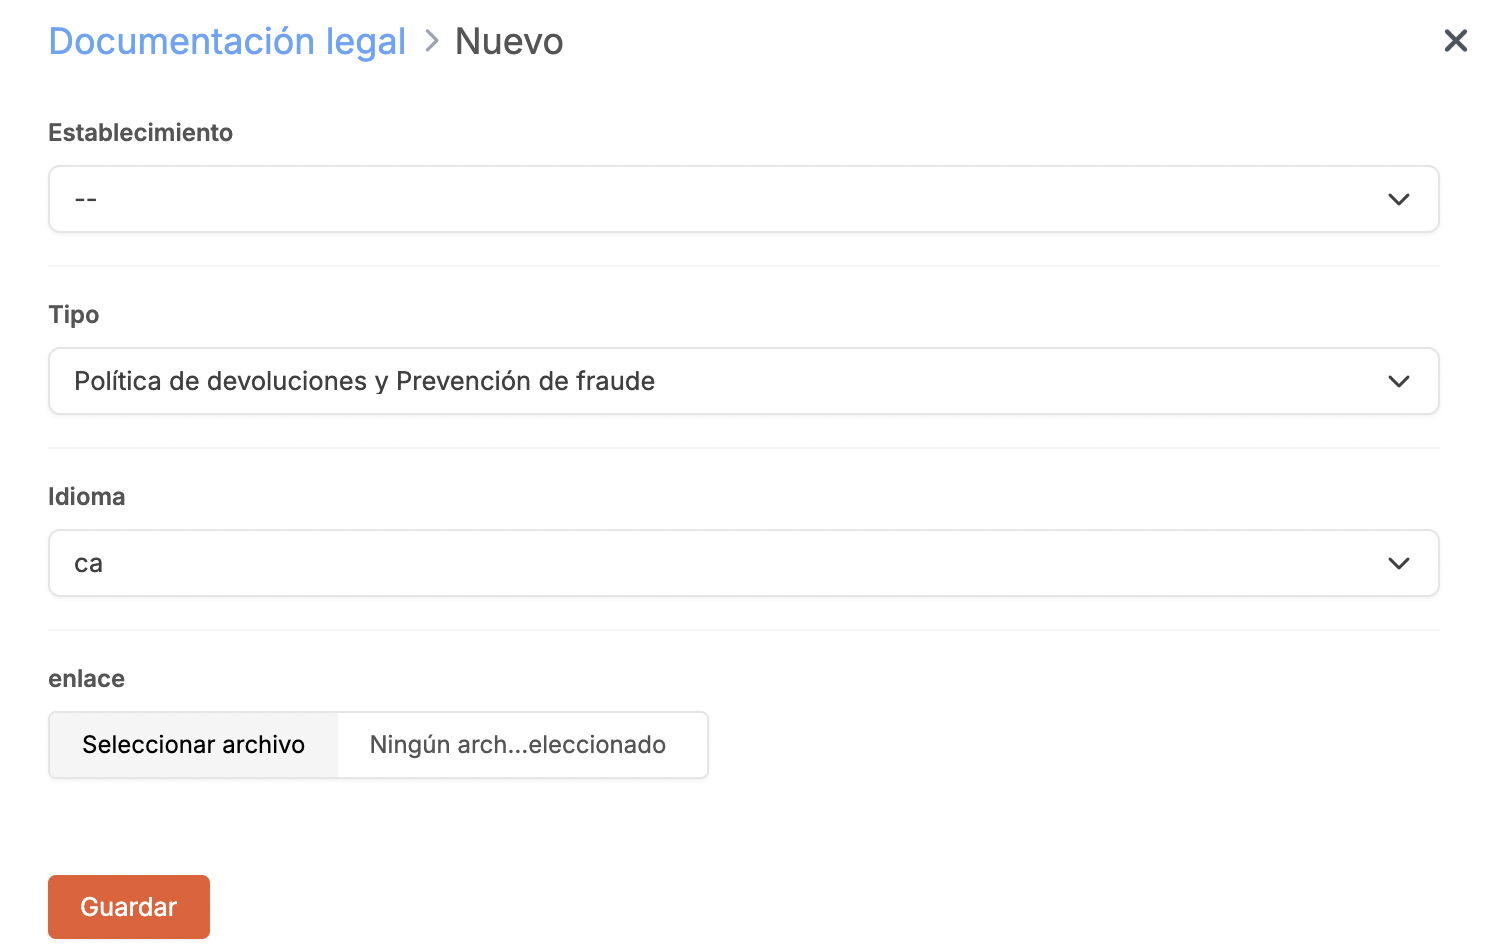
3. Click Save.
4. Repeat for the privacy policy.
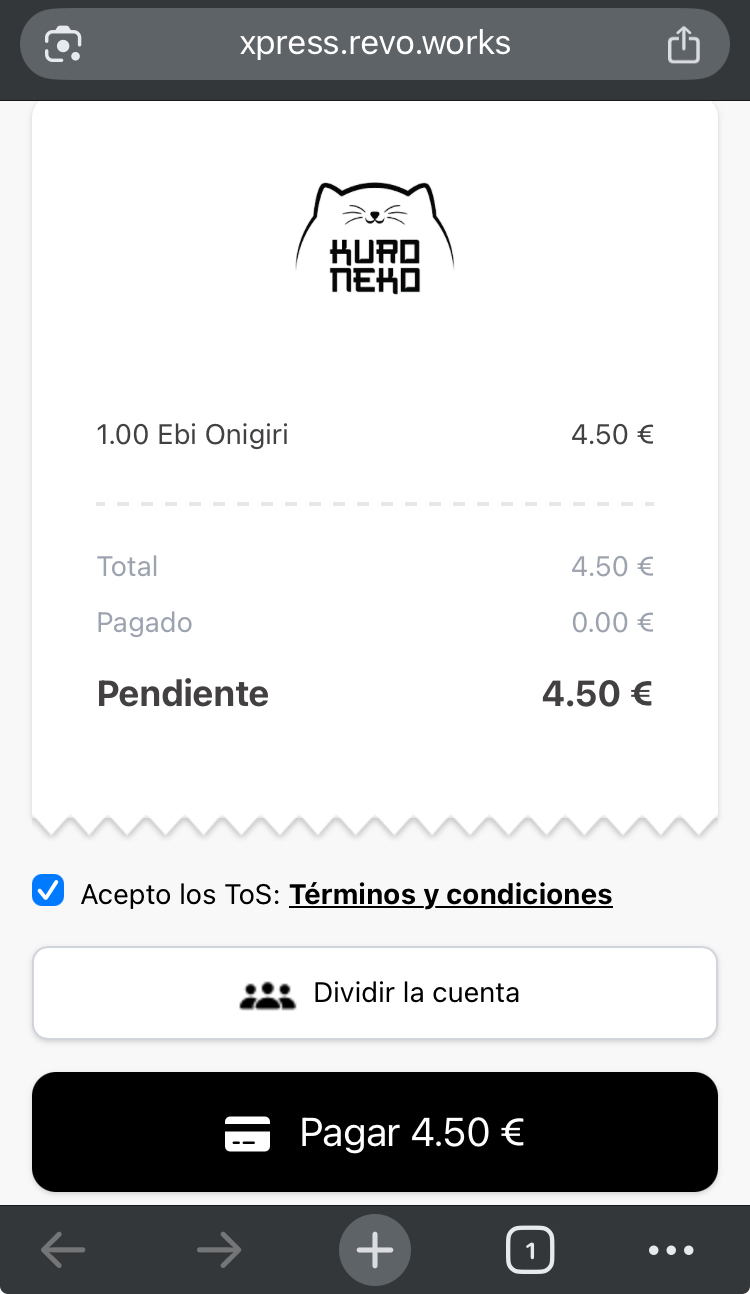
4.3 PAYMENT WITH REVO SOLO
IMPORTANT: Stripe does not allow payments of less than €0,50.
When a customer places an order and chooses to pay by card, they will see this screen:
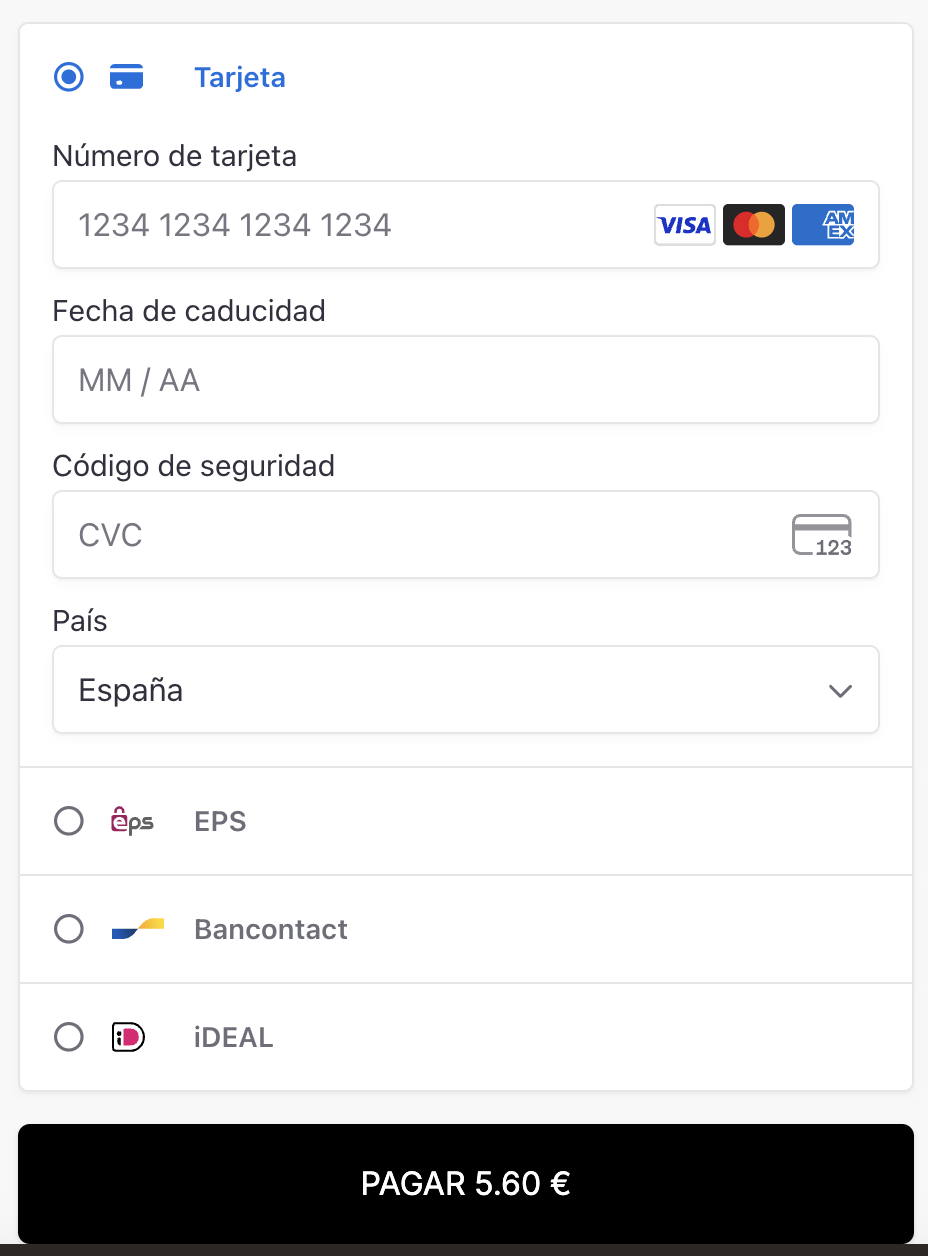


To perform tests, use these Stripe test cards.
5. REVO XEF
5.1 CONFIGURE STRIPE IN REVO XEF
1. Log into the back office of Revo XEF.
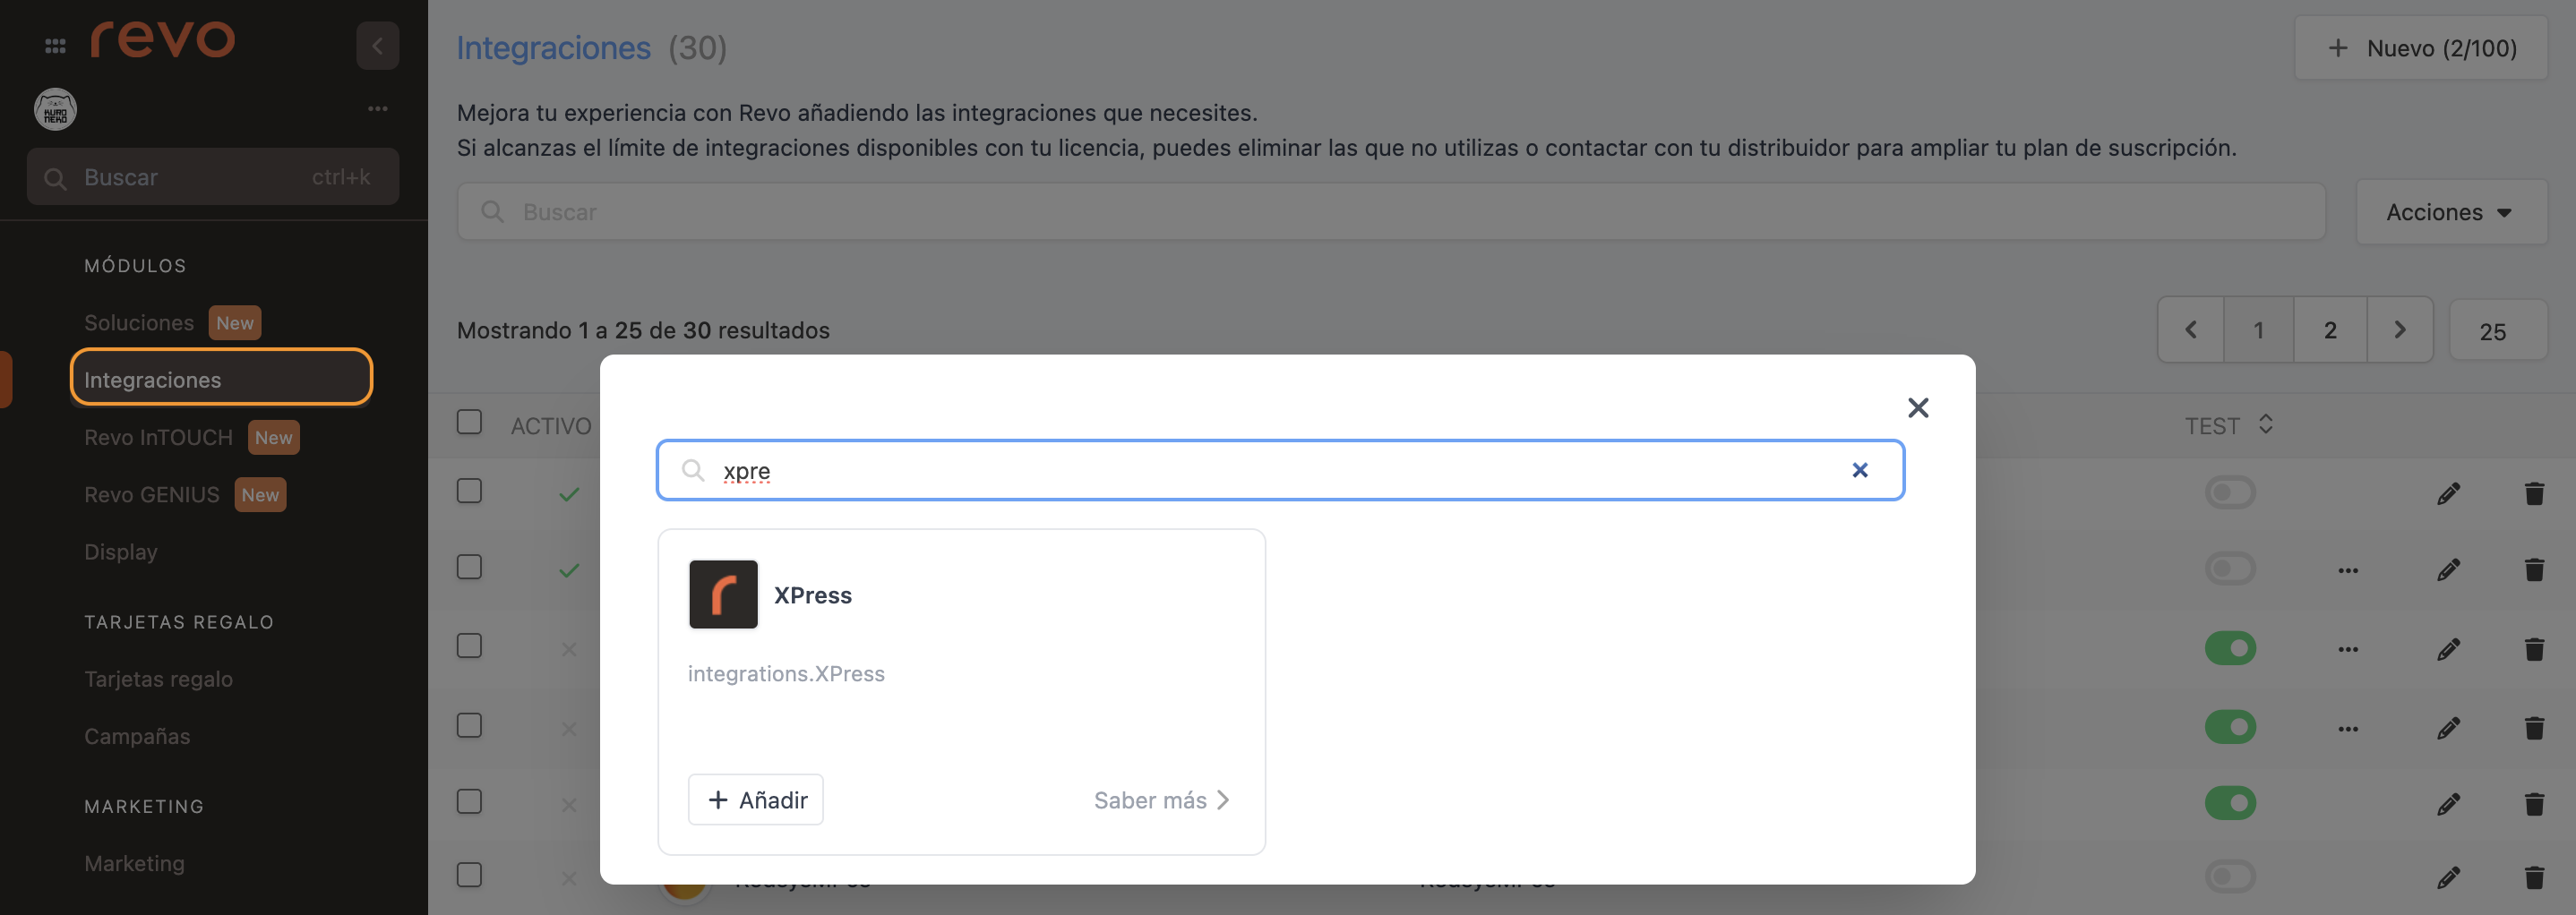
2. Go to Integrations / INTEGRATIONS.
3. Click on + New, search for XPress, and click + Add.
4. Complete the fields:

- Active:
- Name: Integration identifier
- Test: Disabled
- XPress message: Text under the XPress QR code
- Payment methods: Select XPress methods
- Payment gateway: Stripe
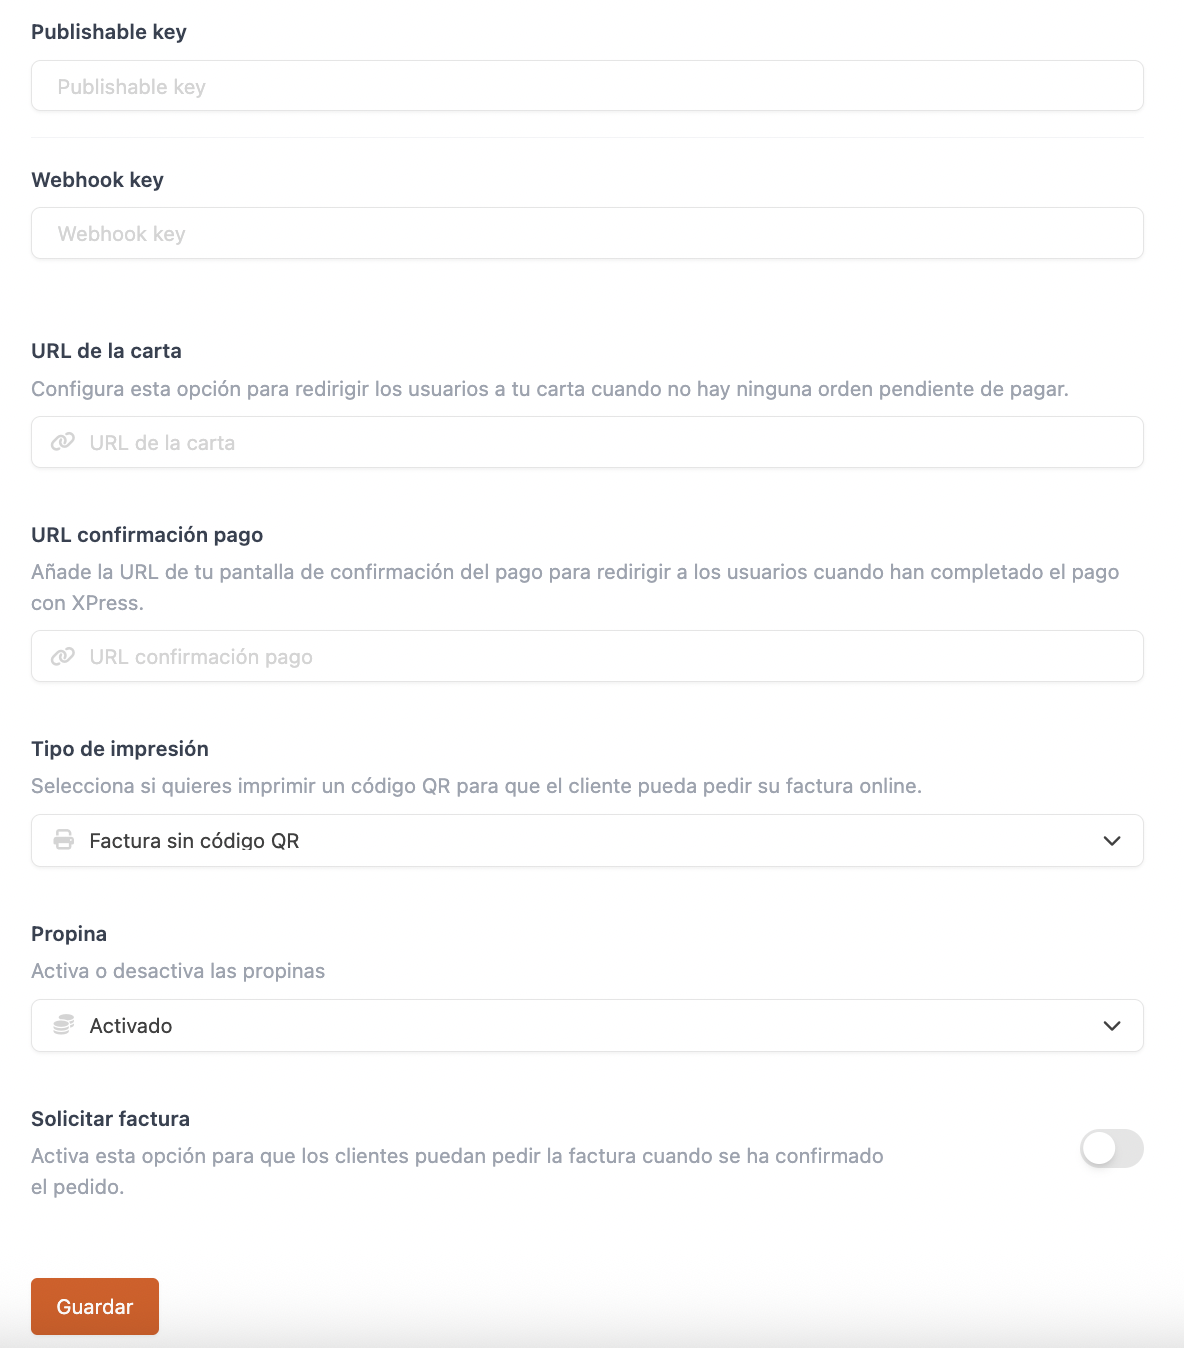
- Secret key: Paste your Stripe secret key
- Publishable key: Paste your Stripe publishable key
- Webhook key: Paste your Stripe webhook key
- Card URL: For redirecting if no order is pending
- Payment confirmation URL: Where the customer is redirected after payment
- Print type: For printing a QR on the receipt
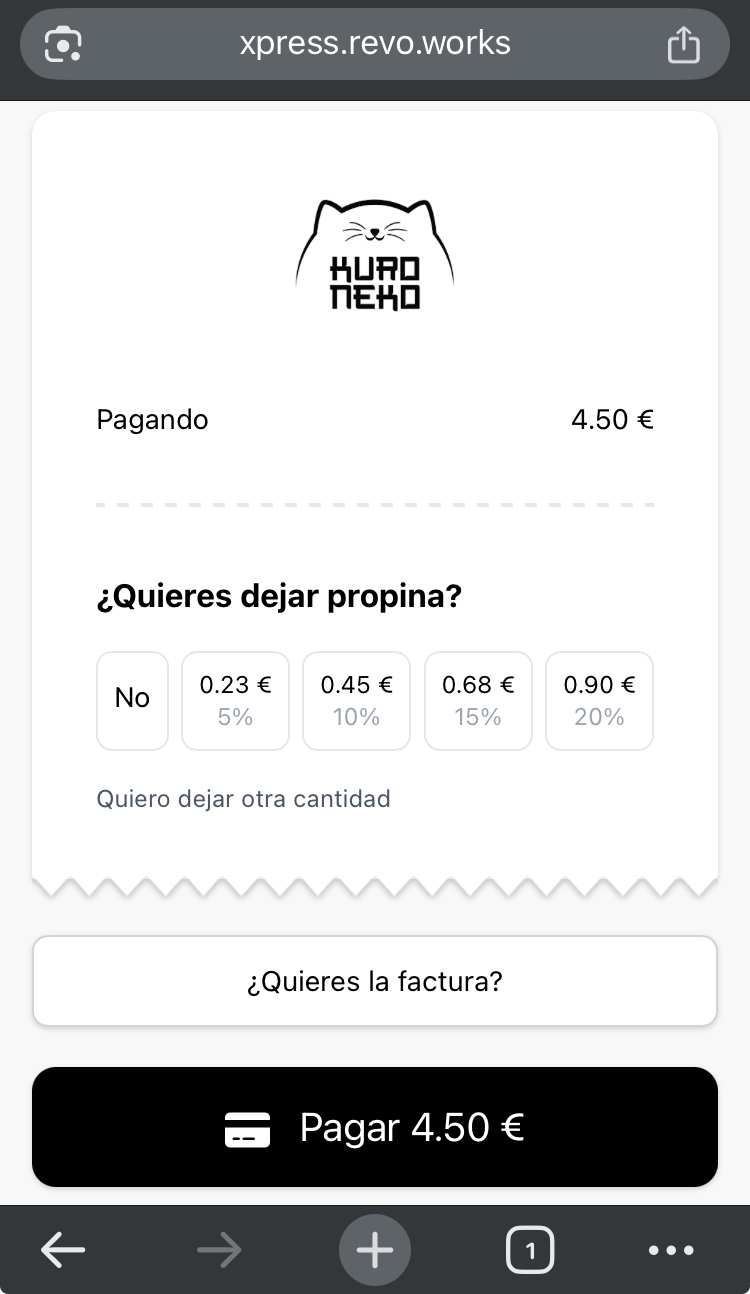
- Tip: Activate or deactivate the tip request
- Ask for invoice: Enable so the customer can request an invoice
5. Click Save.
6. Click on the and select upload privacy and refund policies.
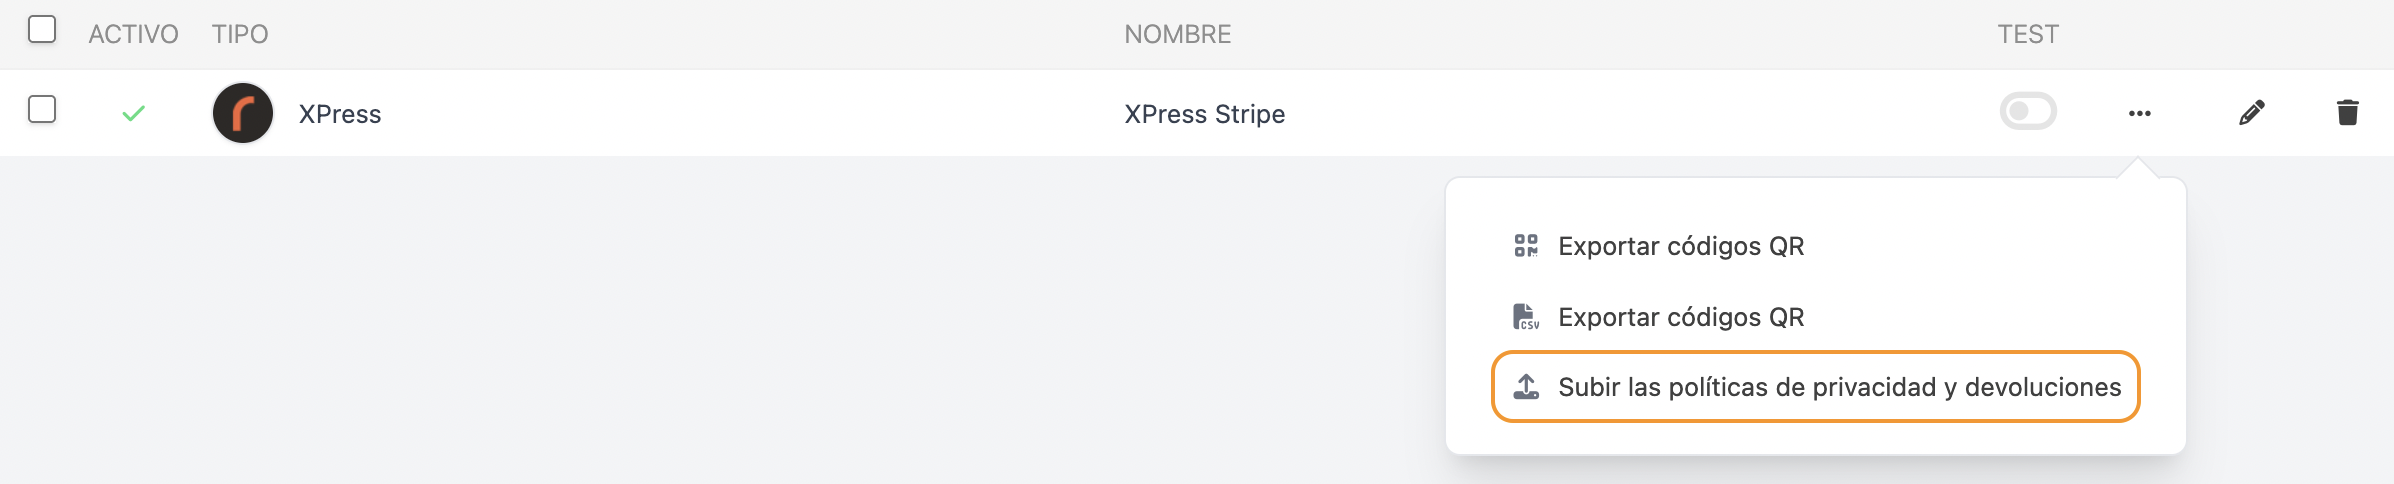
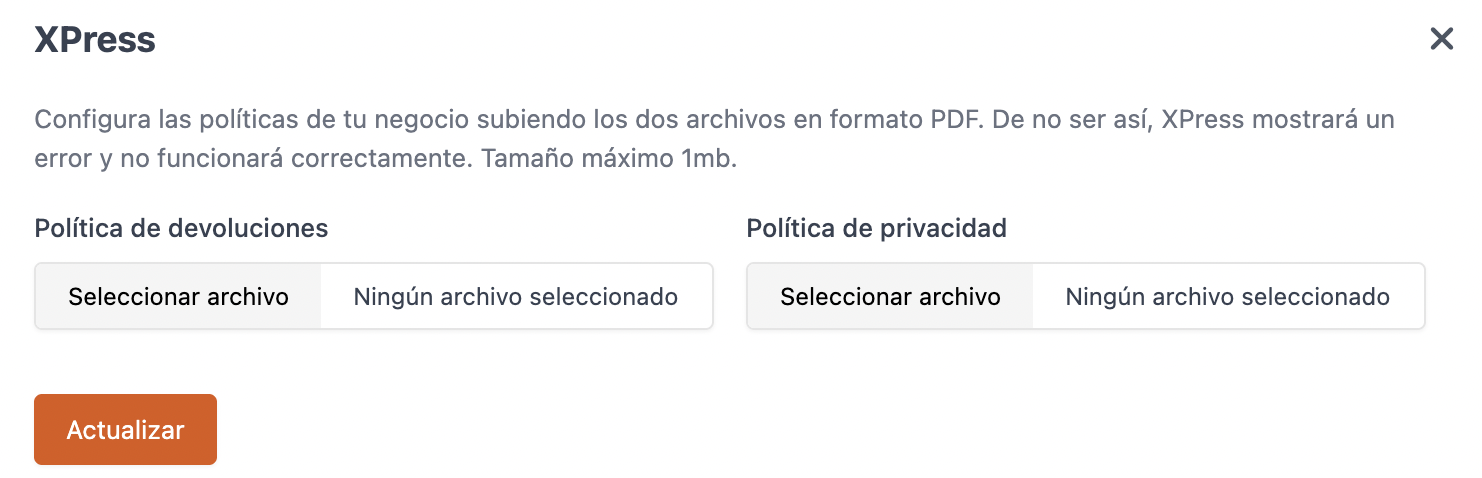
7. Click Update.
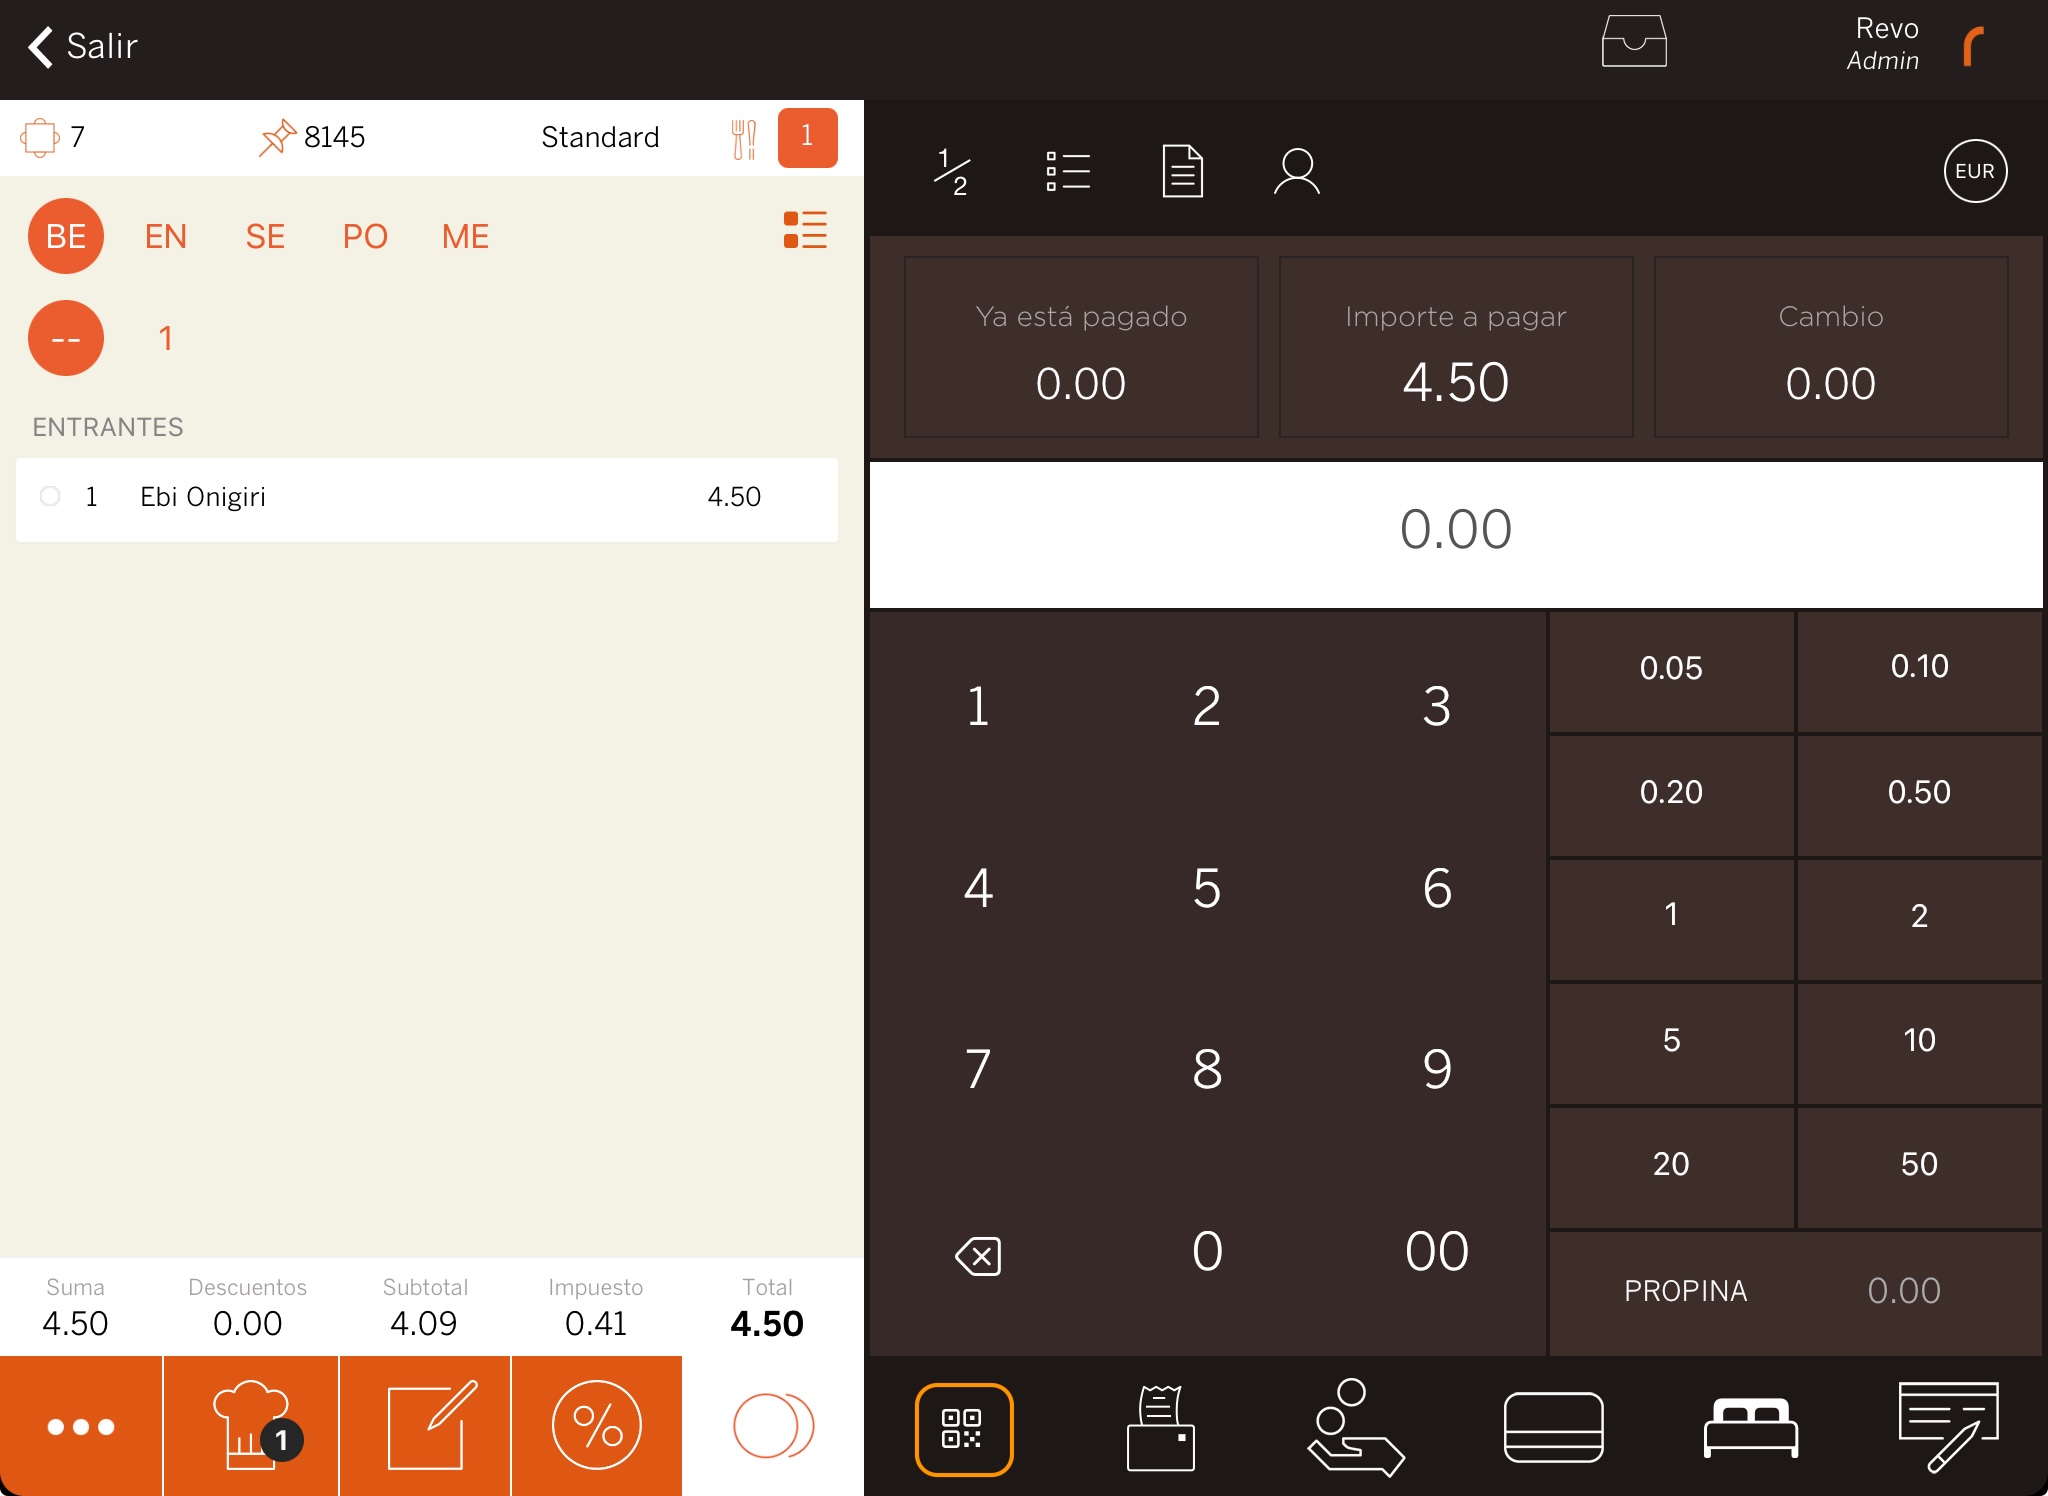
5.2 CHARGE THE ORDER WITH REVO XPRESS
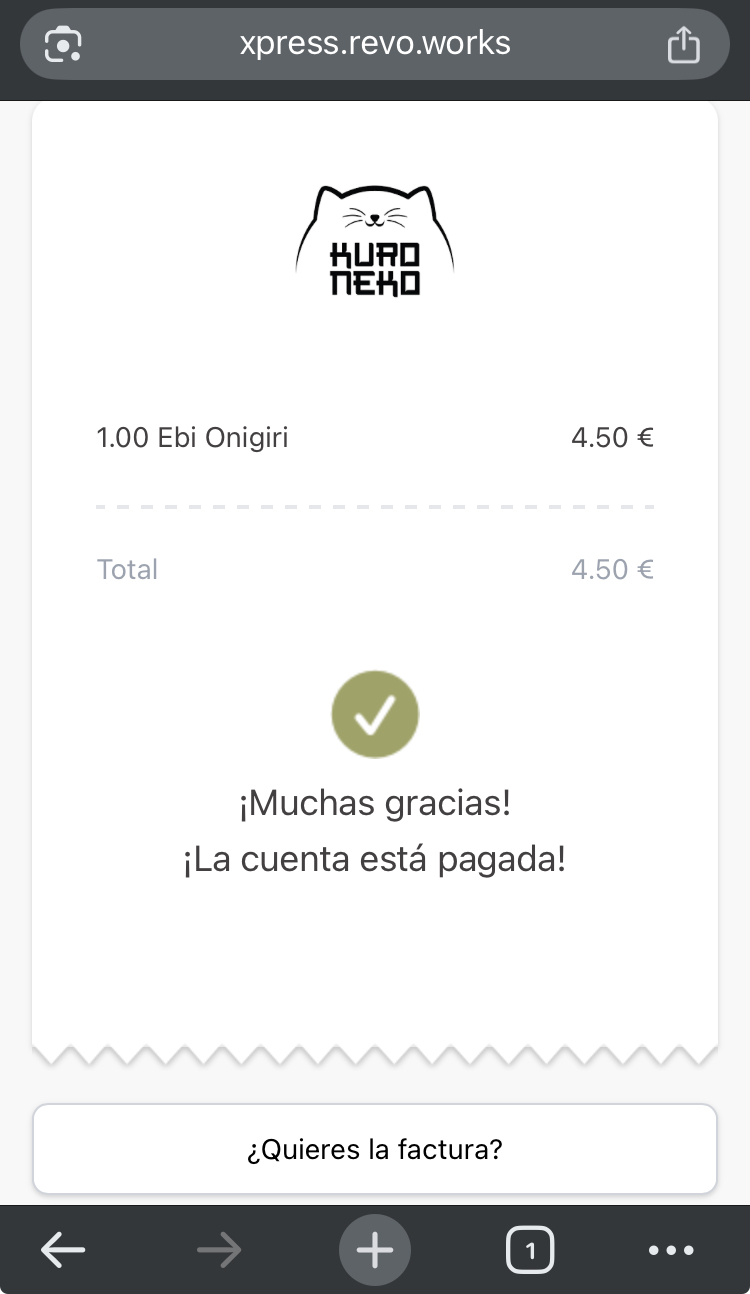
Once everything is configured, payments will be processed correctly.
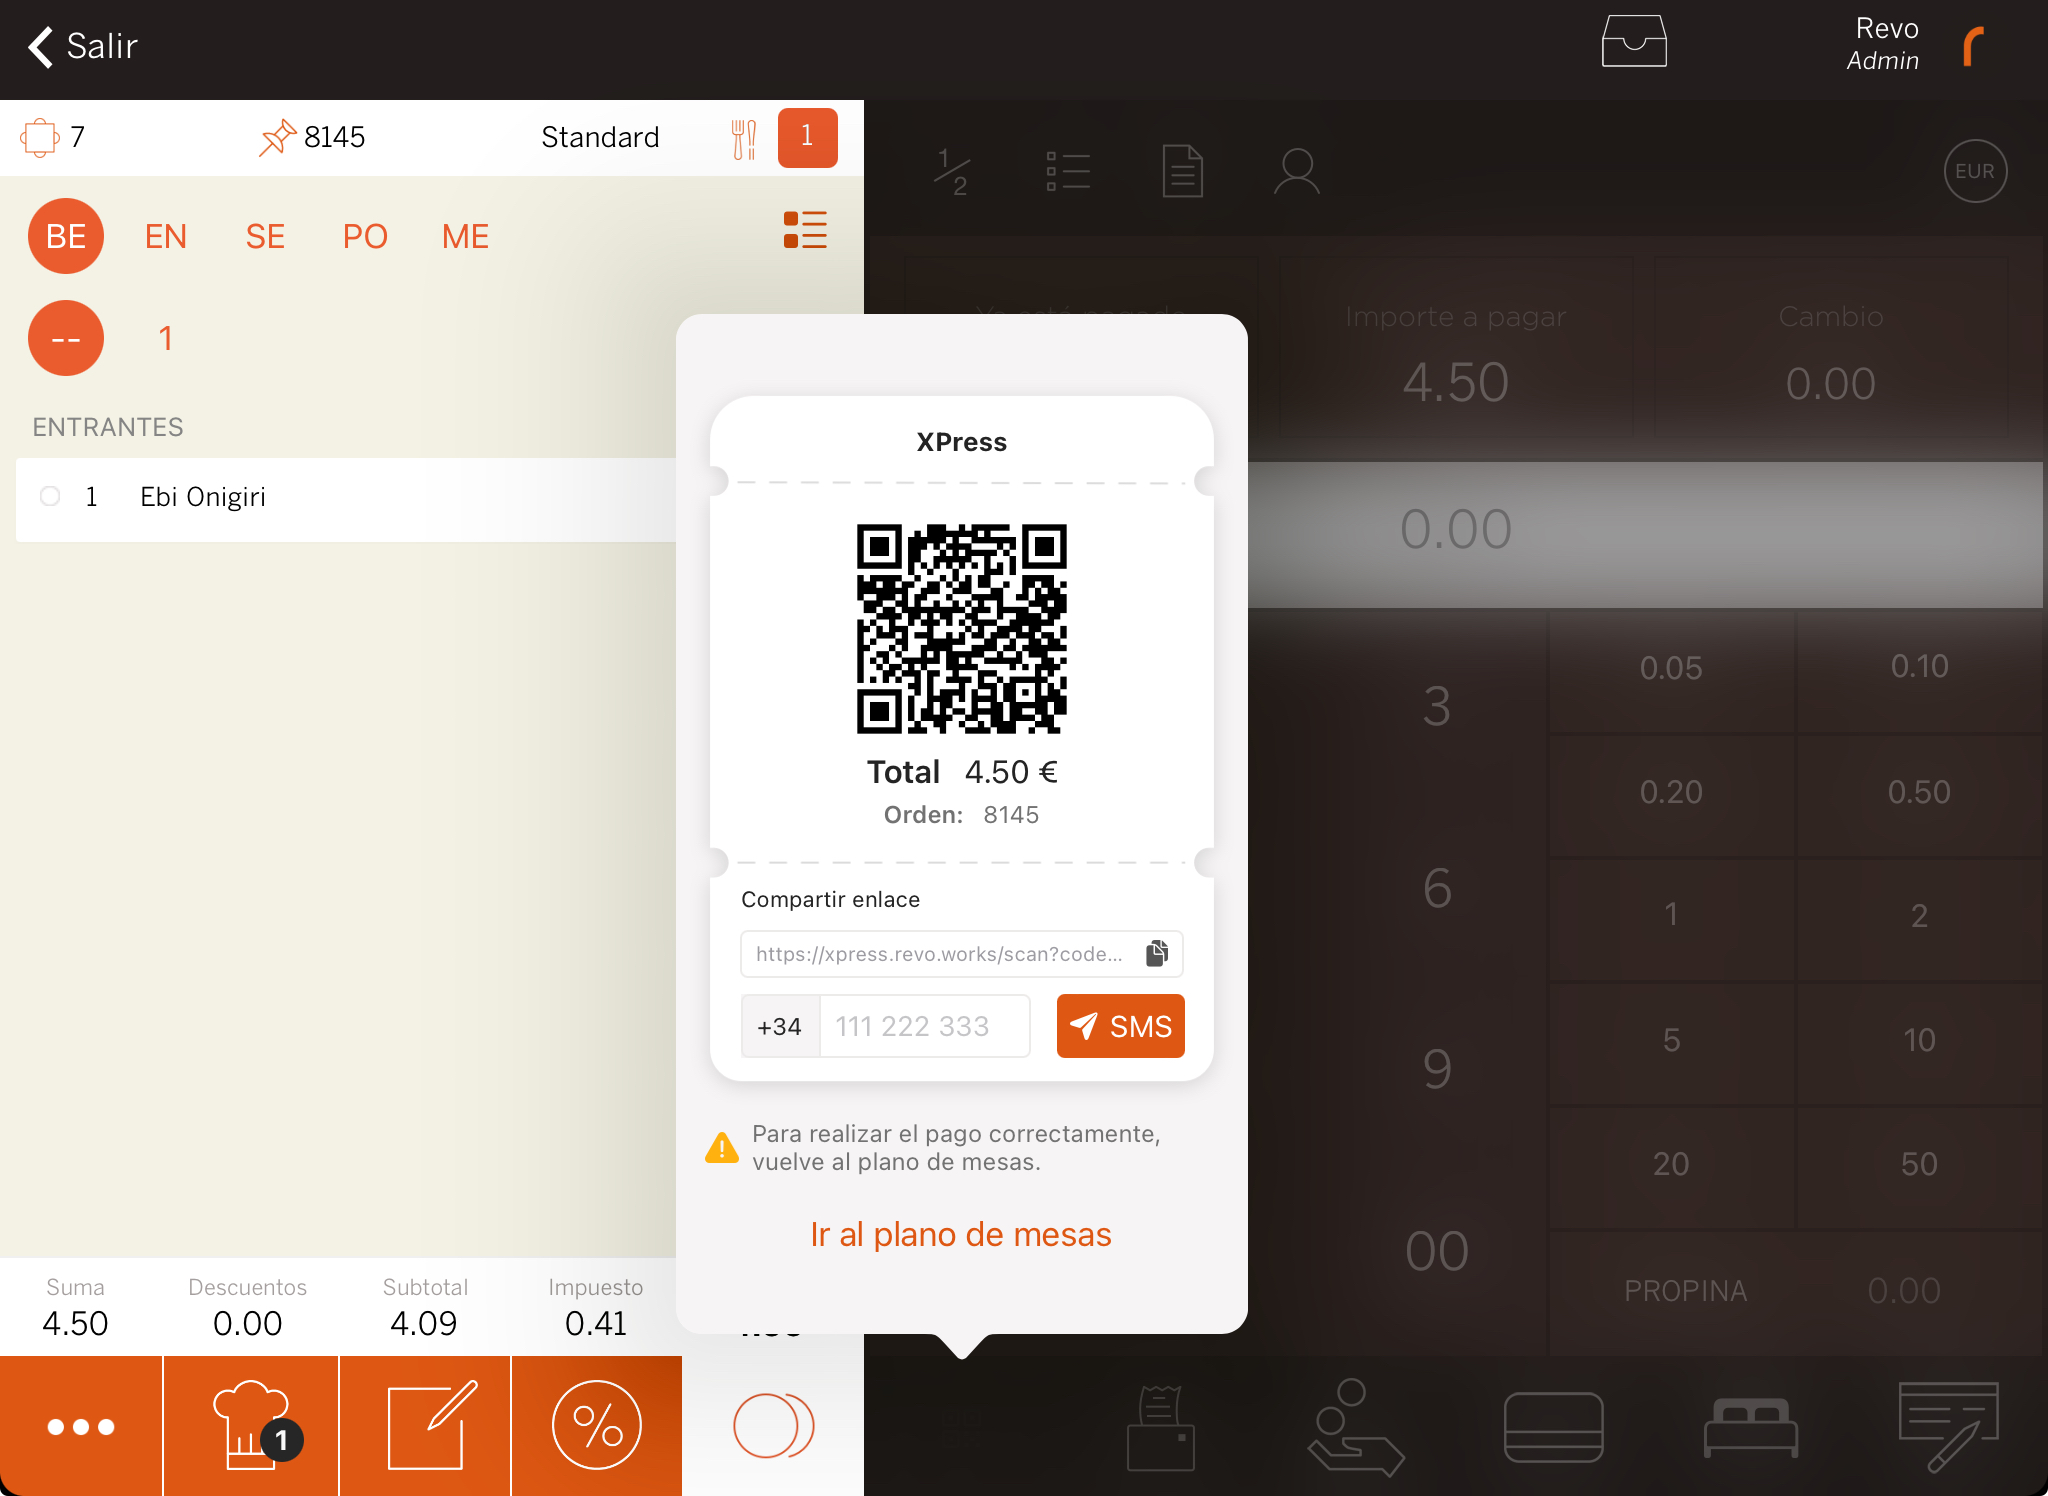
1. Select the QR code.
2. The customer scans it or receives it via SMS.
The waiter must return to the floor plan so the customer can pay.
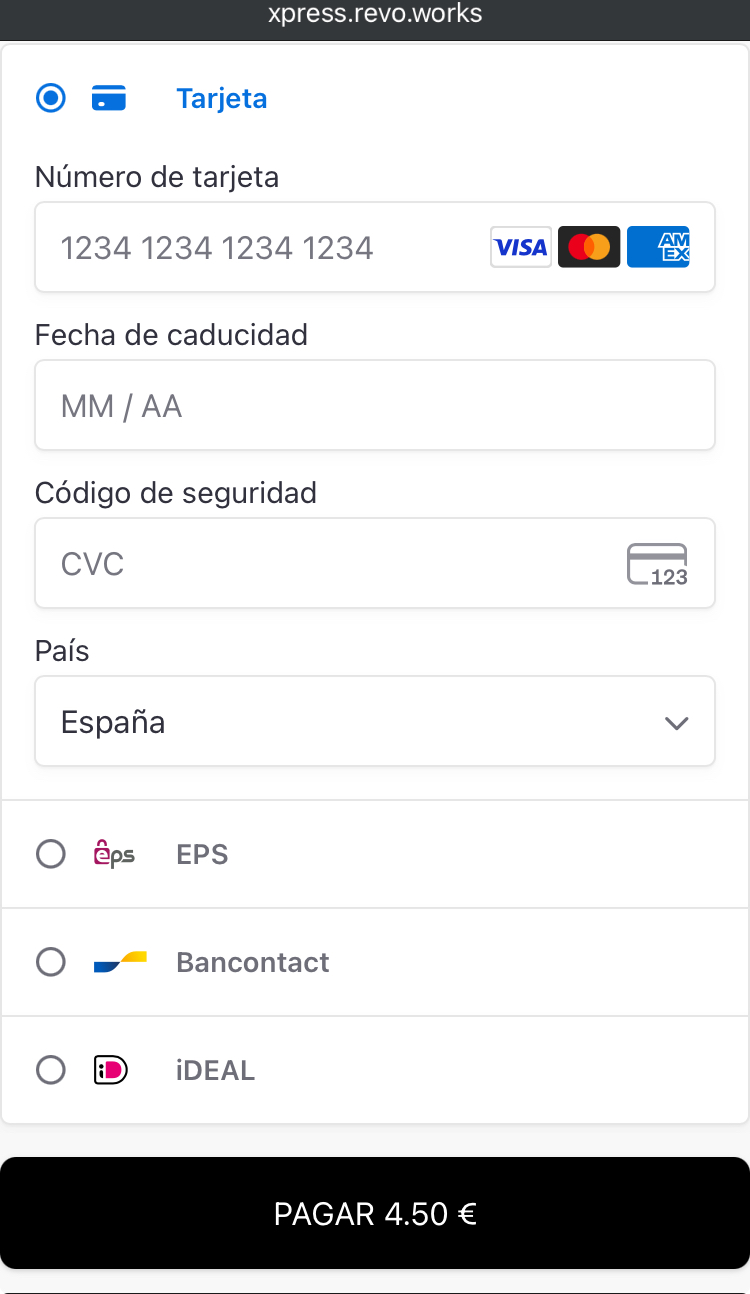
3. The customer follows the on-screen steps and enters their details.