1. OVERVIEW 2. HOW TO CREATE A NEW PERMISSION 3. HOW TO ASSIGN THE PERMISSION TO THE EMPLOYEE
To access the back office, you need a username and password.
These are unique credentials, so anyone with this information can log in. There is no connection limit, meaning multiple people can use the same username and password at the same time.
Just like app permissions, back permissions let you control access to different features. This allows your staff to access the system without sharing the main account’s password.
You can create as many permission groups as needed. Typically, permissions are created and assigned based on job role or function.
1. OVERVIEW
1. Access the Revo XEF back office.
2. Go to Employees / BACK PERMISSIONS.
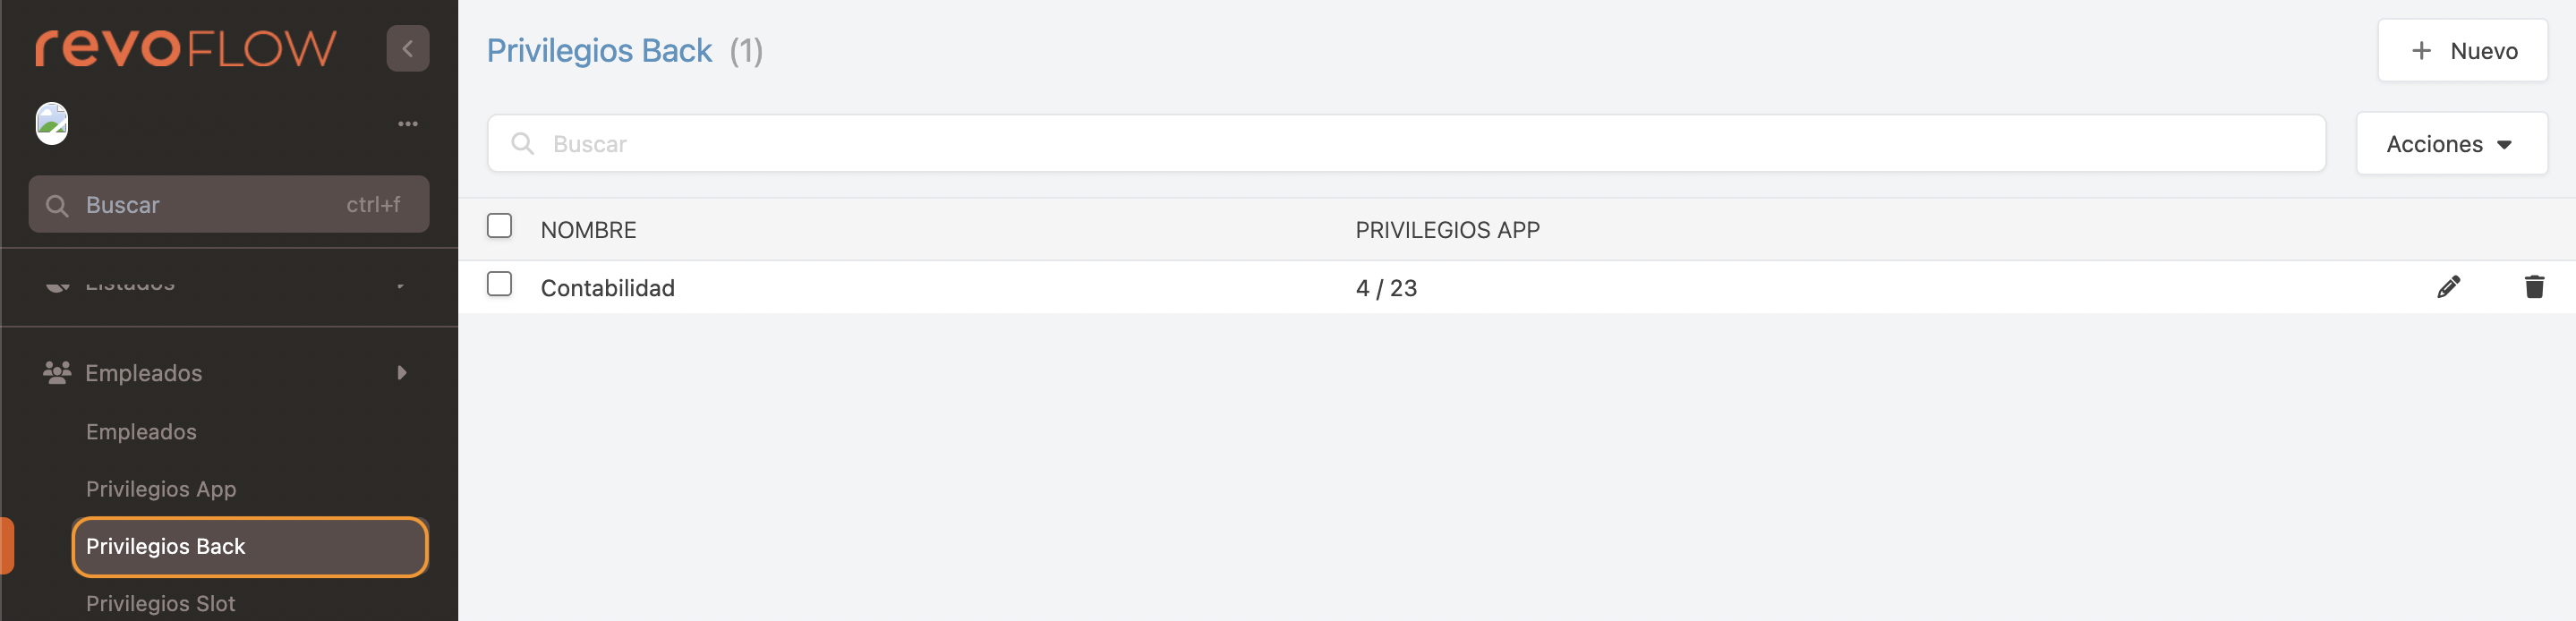
- + New: Create a new permission.
- : Search for permissions.
- Actions: Delete one or more selected permissions.
- : Select all or multiple permissions.
- Name: Name of the permissions.
- App permissions: Indicates how many permissions are in that group. For example, the permission "Accounting" has 4 permissions out of a total of 23.
- : Edit the permission.
- : Delete the permission.
2. HOW TO CREATE A NEW PERMISSION
1. Click on + New and fill in the details:
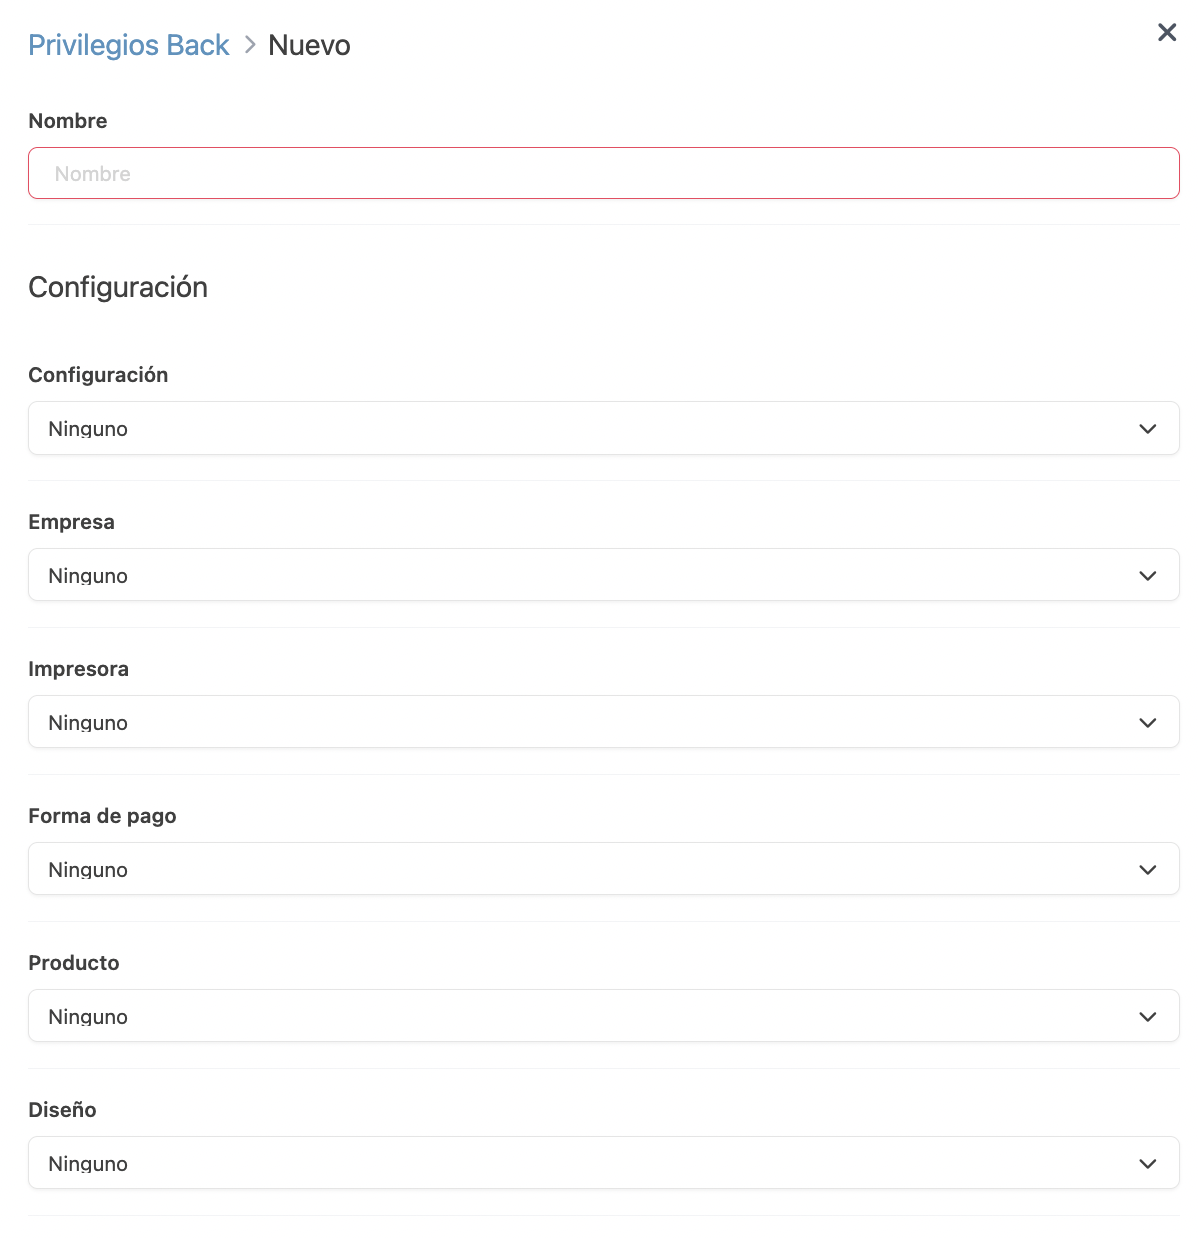


- Name: Add a name to identify the permissions.
SETTINGS
-
Settings: Grants access to the Settings module.
-
Company: Grants access to the company section.
-
Printer: Grants access to the printers section.
-
Payment method: Grants access to the payment methods section.
-
Product: Grants access to the products section.
-
Design: Grants access to the design section.
-
Room: Grants access to the rooms section.
-
Table: Grants access to the tables section.
-
Cancellation policy: Grants access to the cancellation policies section.
-
Synchronise: No action applied.
APP PERMISSION
-
Employee: Grants access to the Employees module.
-
App permission: Grants access to the app permissions section.
BOOKING
- Service: Grants access to the services section.
REPORTS
-
Reports: Grants access to the Reports module.
-
Booking: Grants access to the bookings section.
-
Customer: Grants access to the customers section.
-
Payment: Grants access to the payments section.
MODULE
-
Integration: Grants access to the Integrations module.
-
Payment gateways: Grants access to the payment gateways section.
-
Revo SLOT: Grants access to the Revo SLOT section.
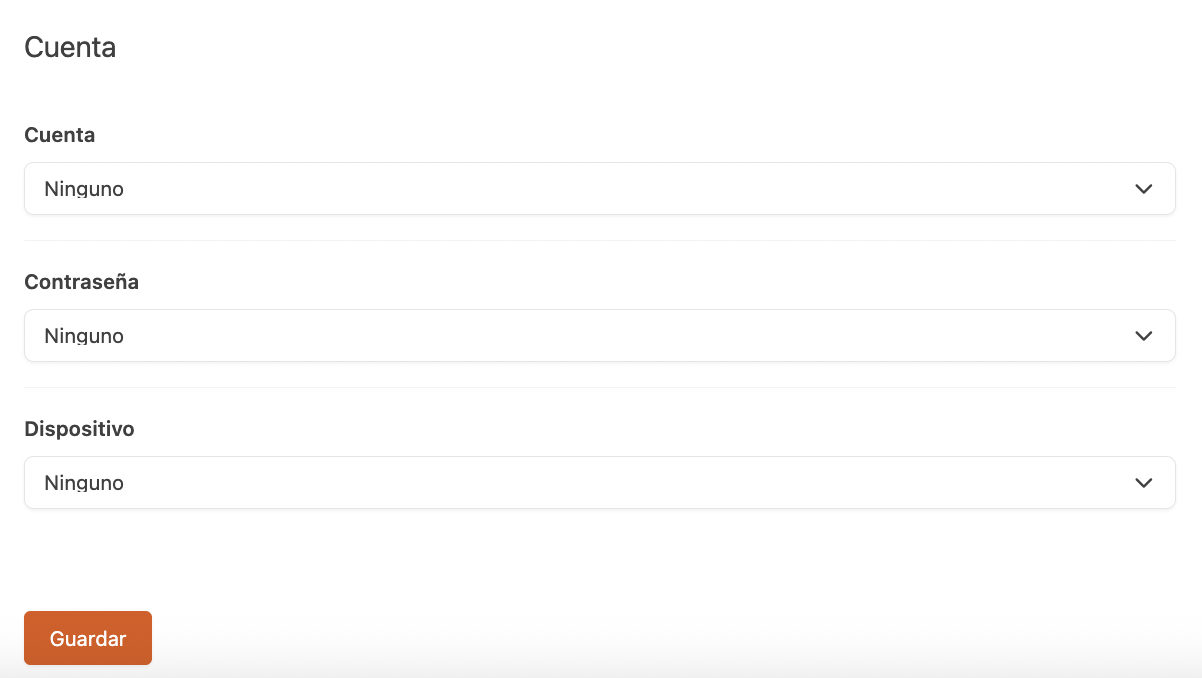
ACCOUNT
-
Account: Grants access to the Account module.
-
Password: Grants access to the passwords section.
-
Device: Grants access to the devices section.
The types of permission you can assign are:
-
None: Do not grant any permissions.
-
View: Allow view-only access.
-
View + Active: Allow viewing and modifying the active state.
-
View + Active + Edit: Allow viewing, modifying the active state, and editing.
-
Full: Allow all permissions.
3. HOW TO ASSIGN THE PERMISSION TO THE EMPLOYEE
Once you’ve created the profile in Back permissions, you must assign it to the relevant employee.
1. Go to Employees / EMPLOYEES.
2. Create a new employee or edit an existing one.
3. In the back office section, create a username and password. Then, select the back permission you created from the dropdown menu.
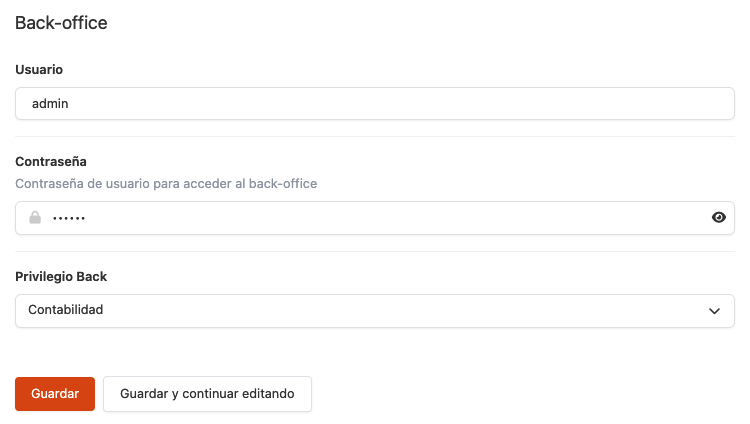
4. Click Save.
For each staff member to access their personalised back-office page, they must log in via the URL: revoflow.works. Then, they should enter their username using the format: name@storename and the assigned password.