Creating a reservation with Revo FLOW is very easy and intuitive!
From any screen, you can tap the button in the top right corner. You’ll then see this screen:
1. Select the number of guests:
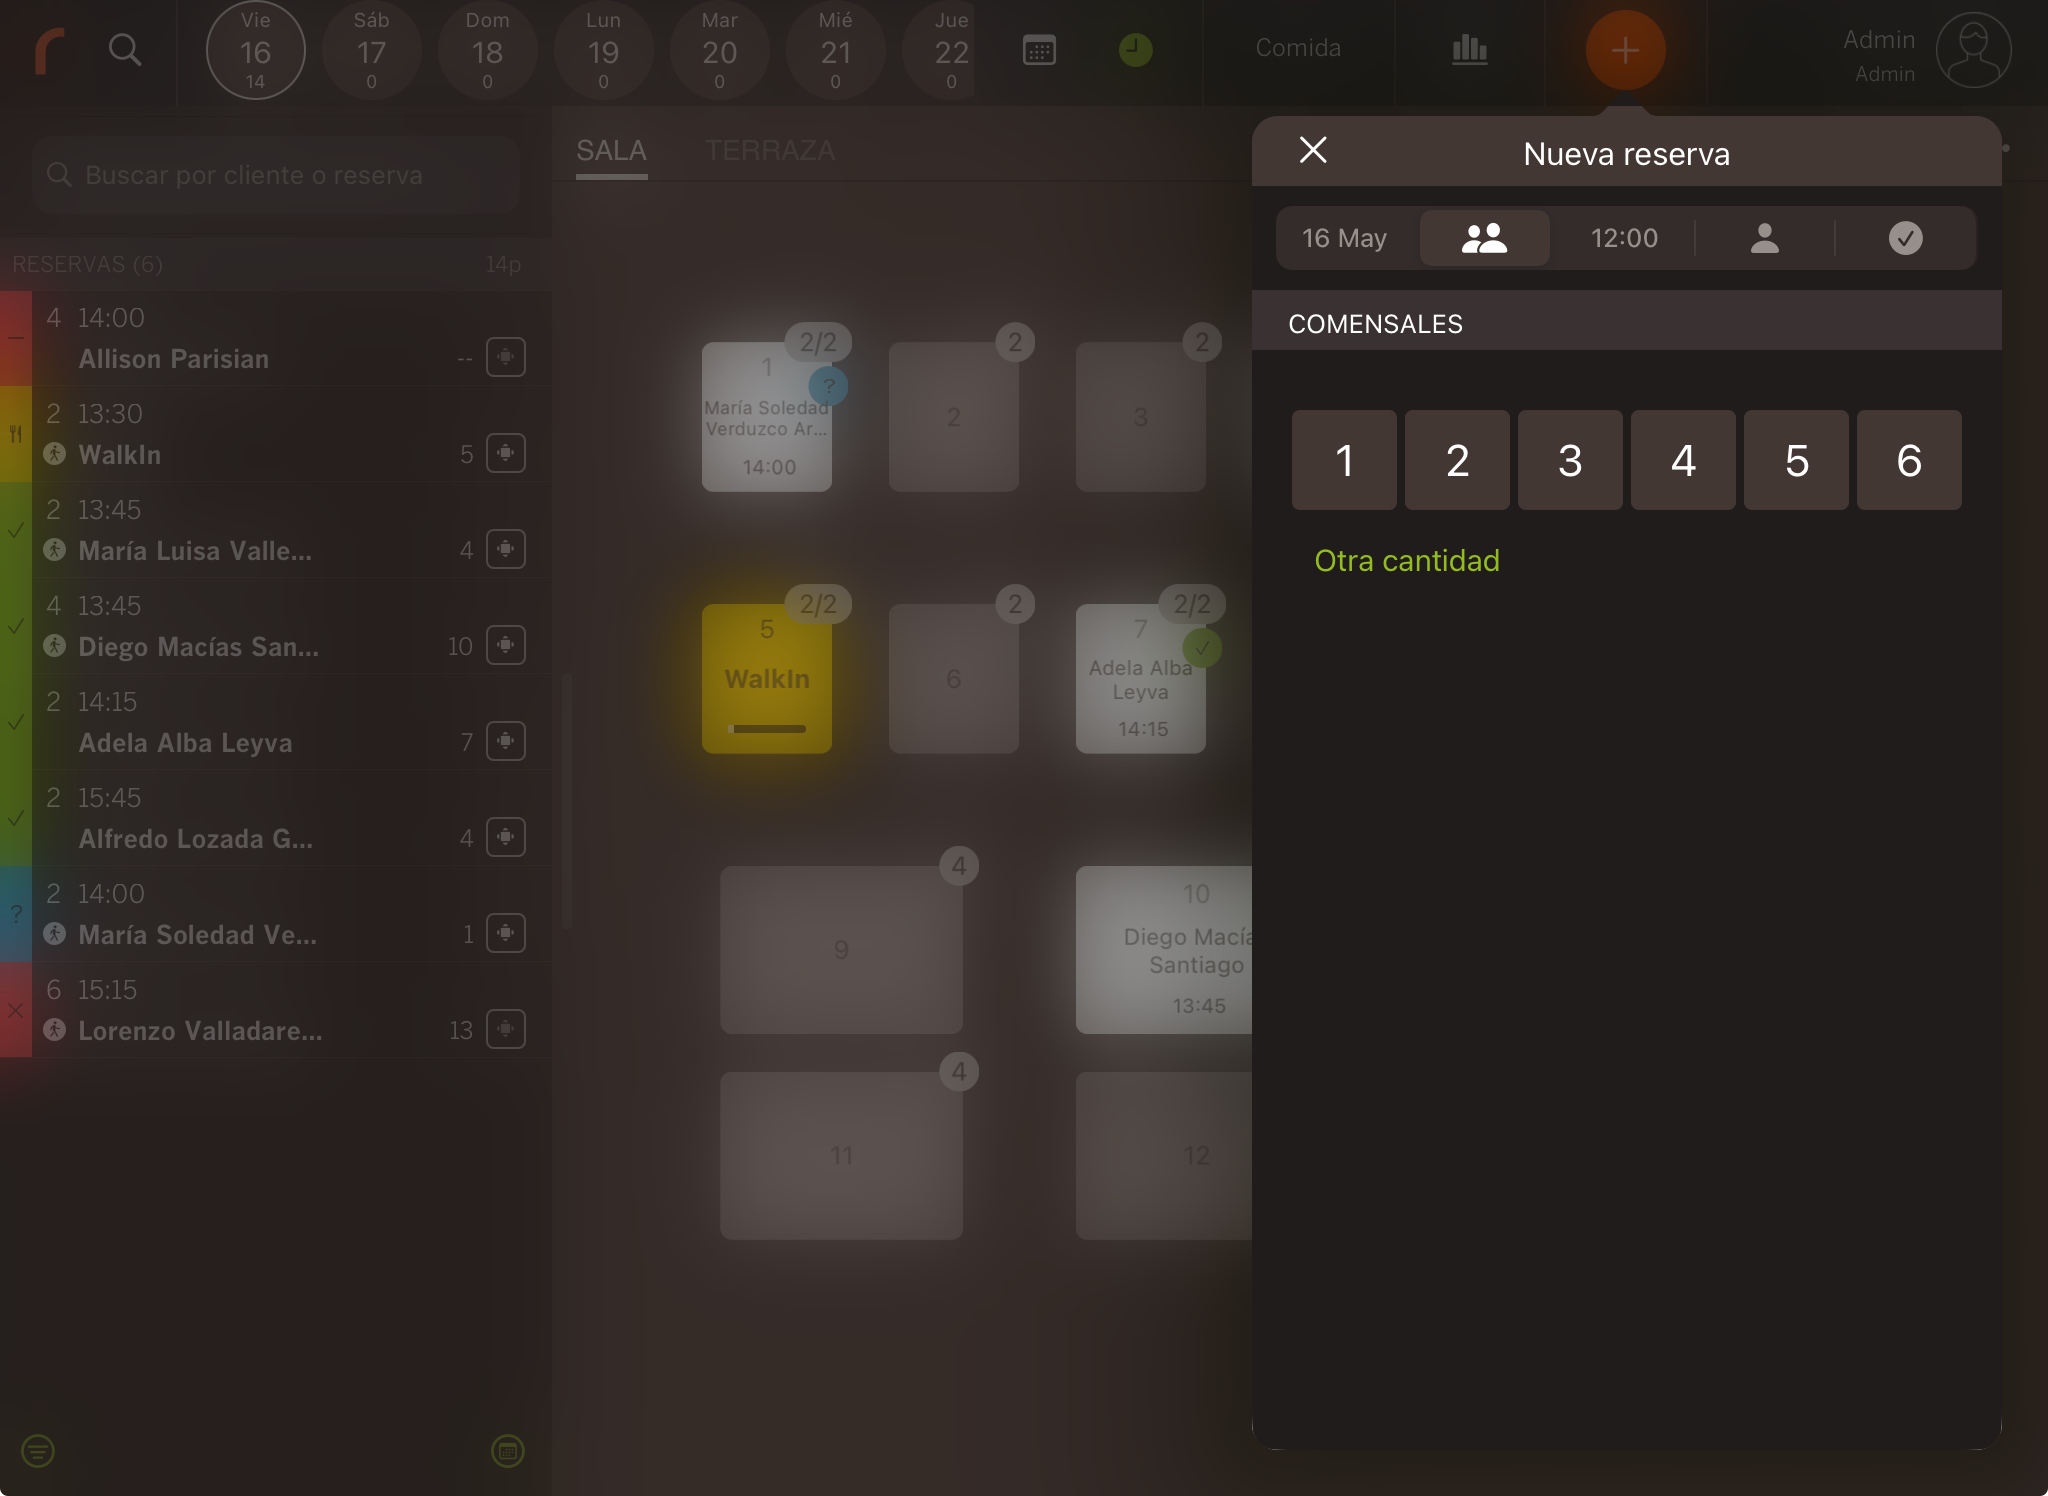
- Date: The current date is shown by default. You can tap to choose a different date.
- Guests: If there are more than 6 guests, tap Other amount and enter the number.
2. Select the reservation time and room.

- Room: Swipe or tap to change the room.
- Slot: Below each available time slot, you’ll see the room’s occupancy capacity.
3. Look up the customer.
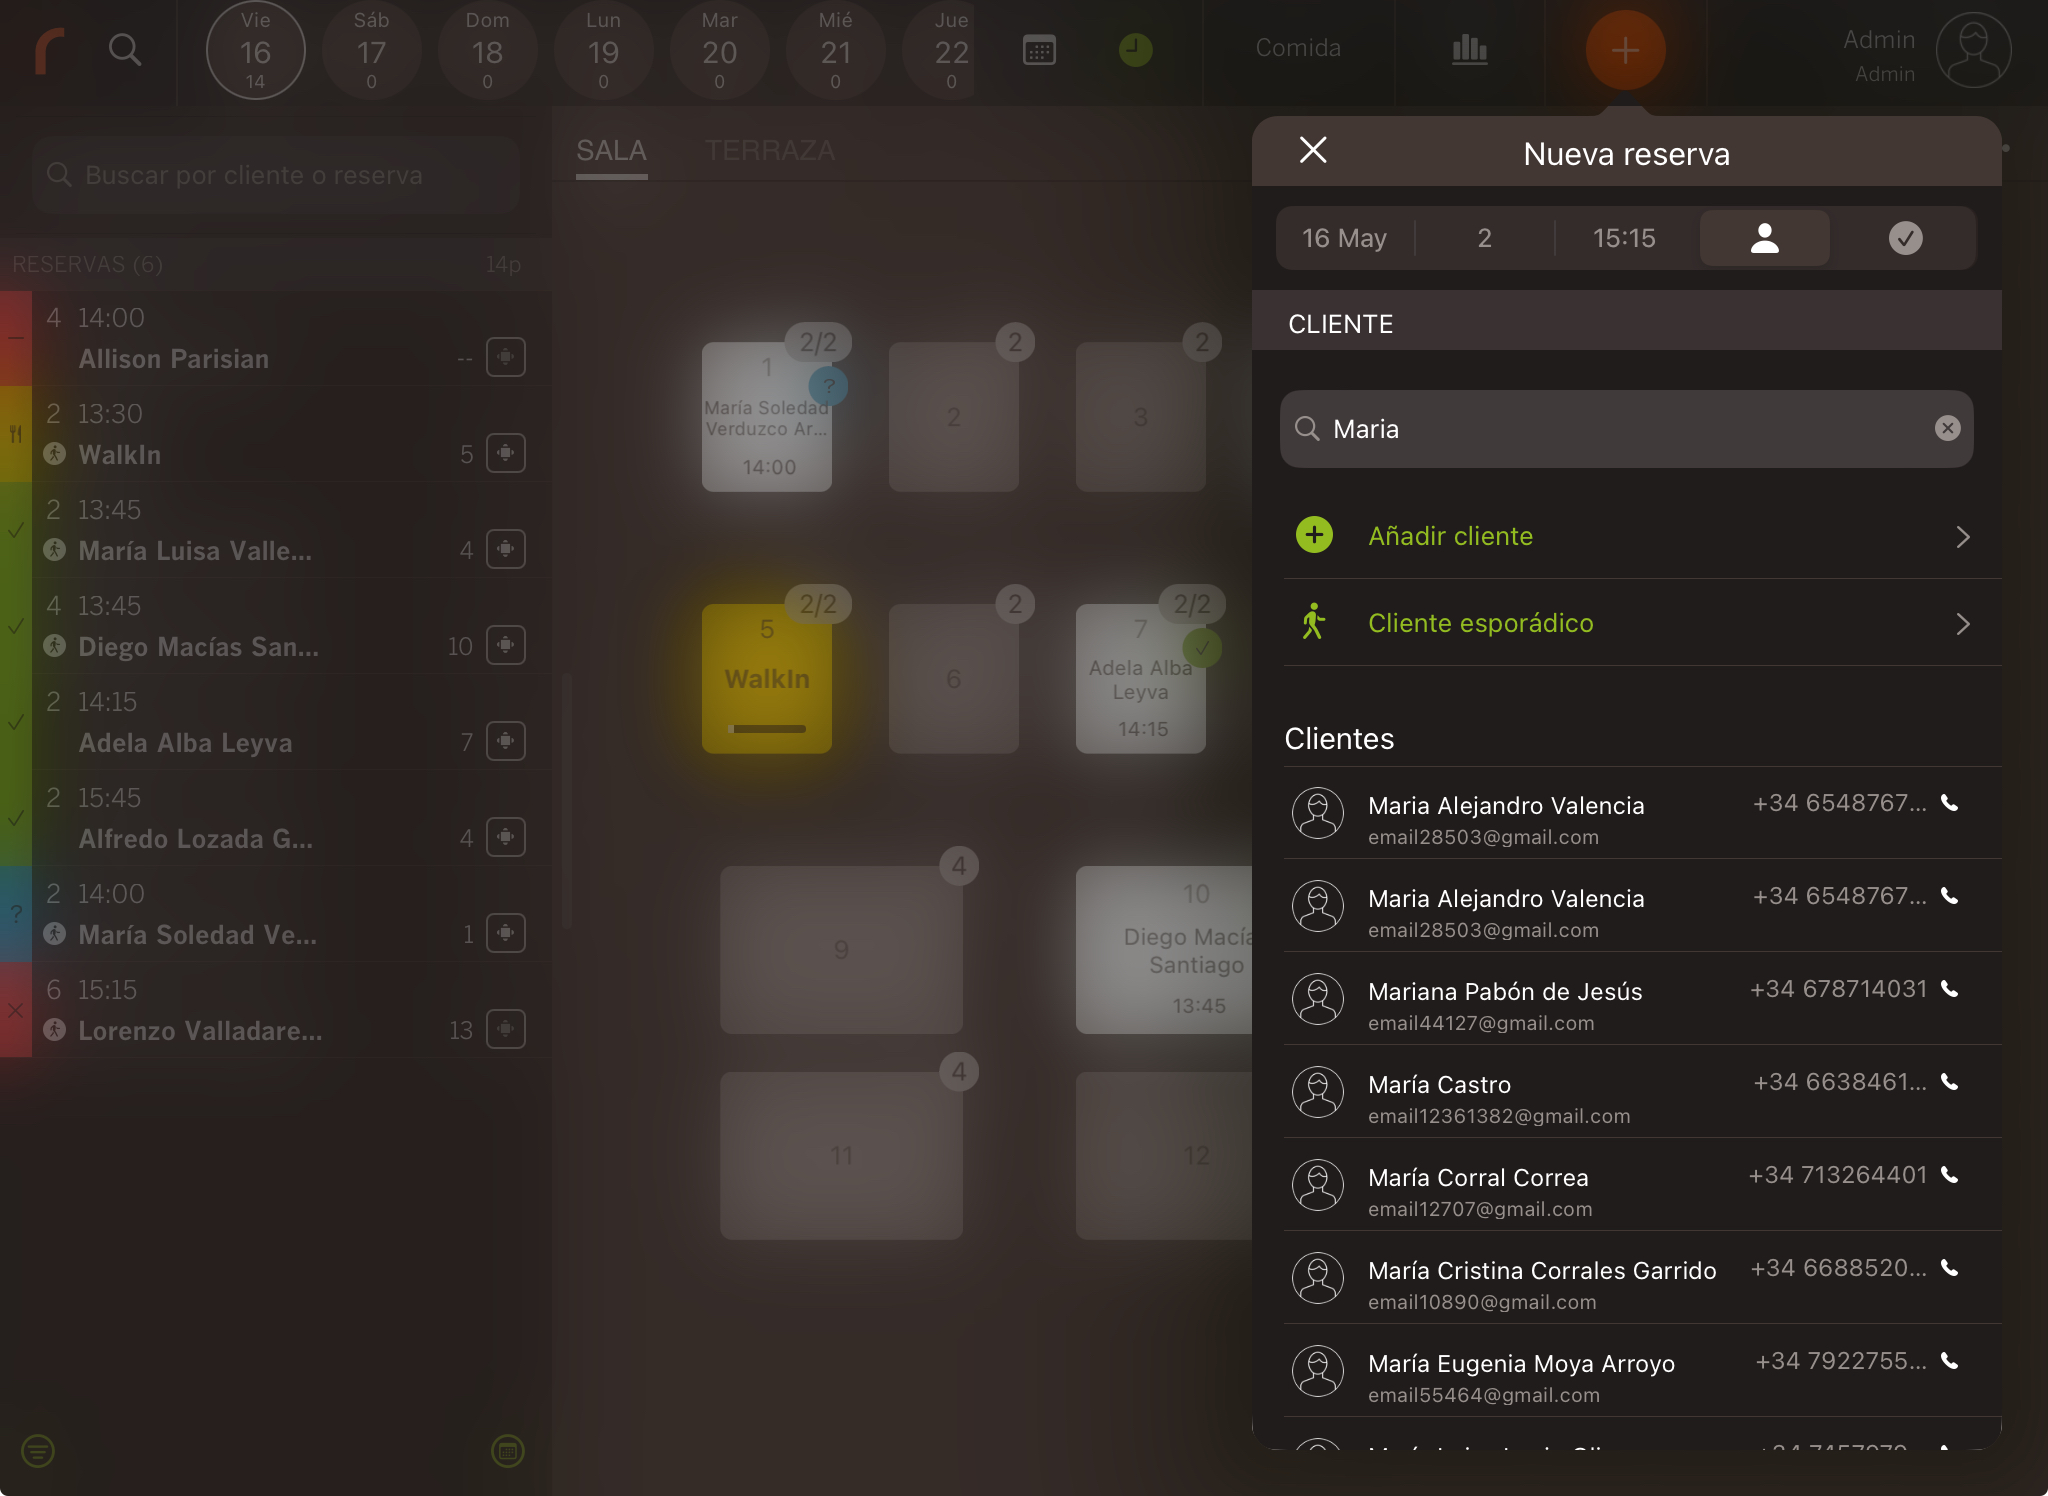
- Regular customer: Use the search bar to find existing customers by name, surname, phone number, or email.
- Add customer: If you can’t find the customer, tap Add customer and fill in their details or create a new customer directly.
- Occasional customer: If you don’t want to save the customer’s details, they won’t be stored.
4. Confirm the reservation.
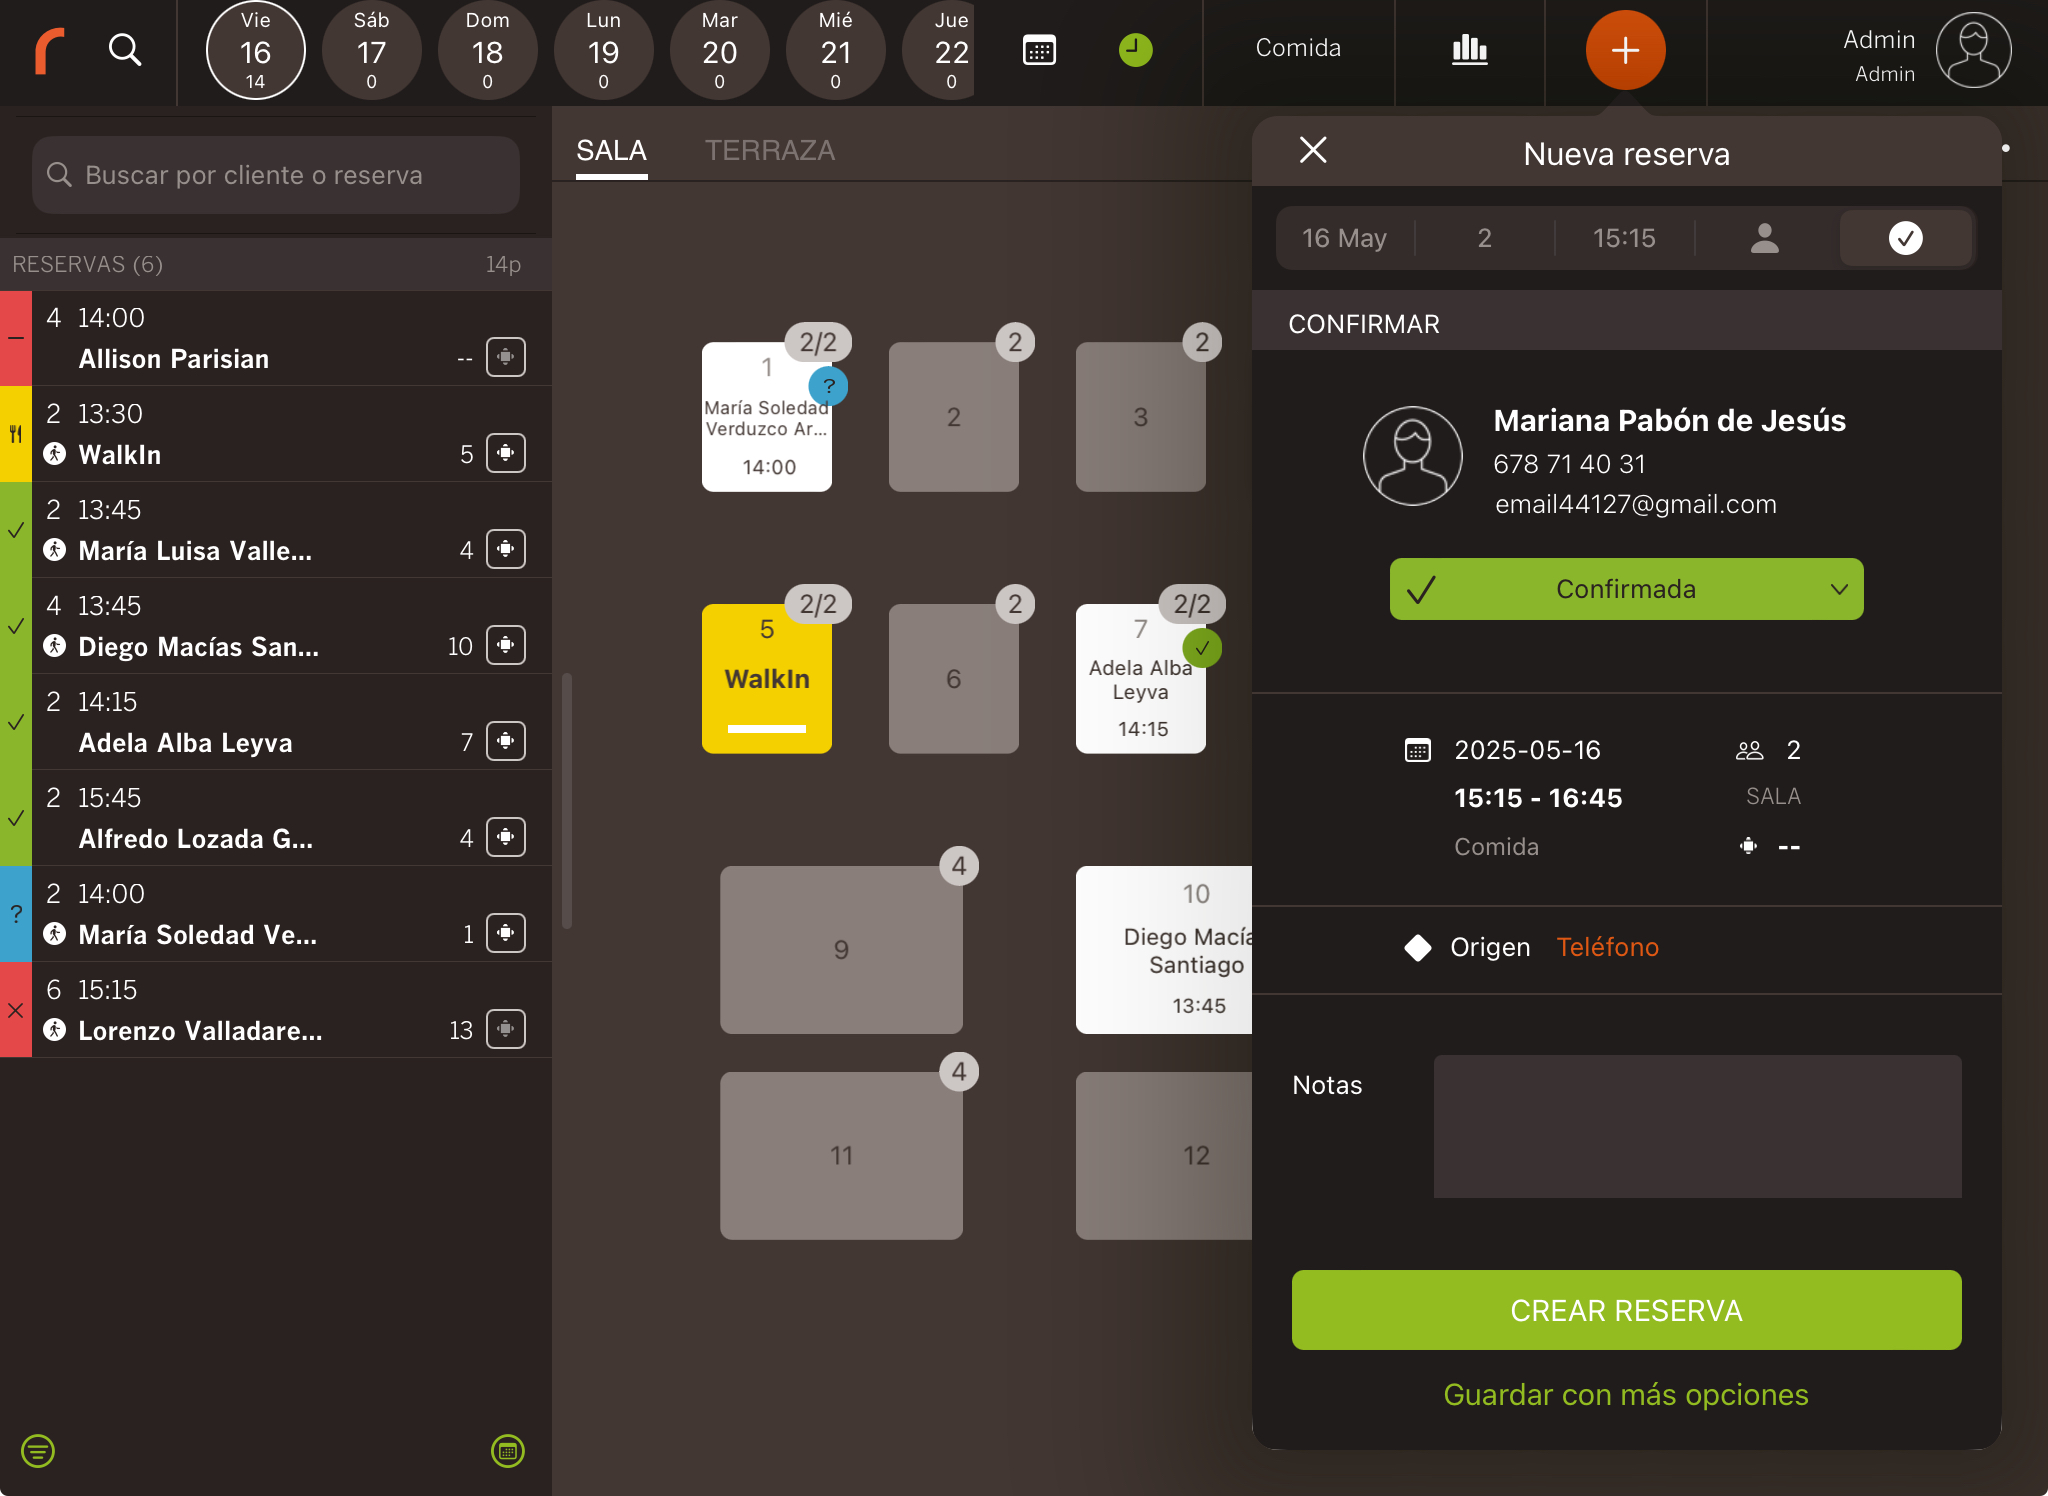
Tap Create booking to confirm, or to cancel.
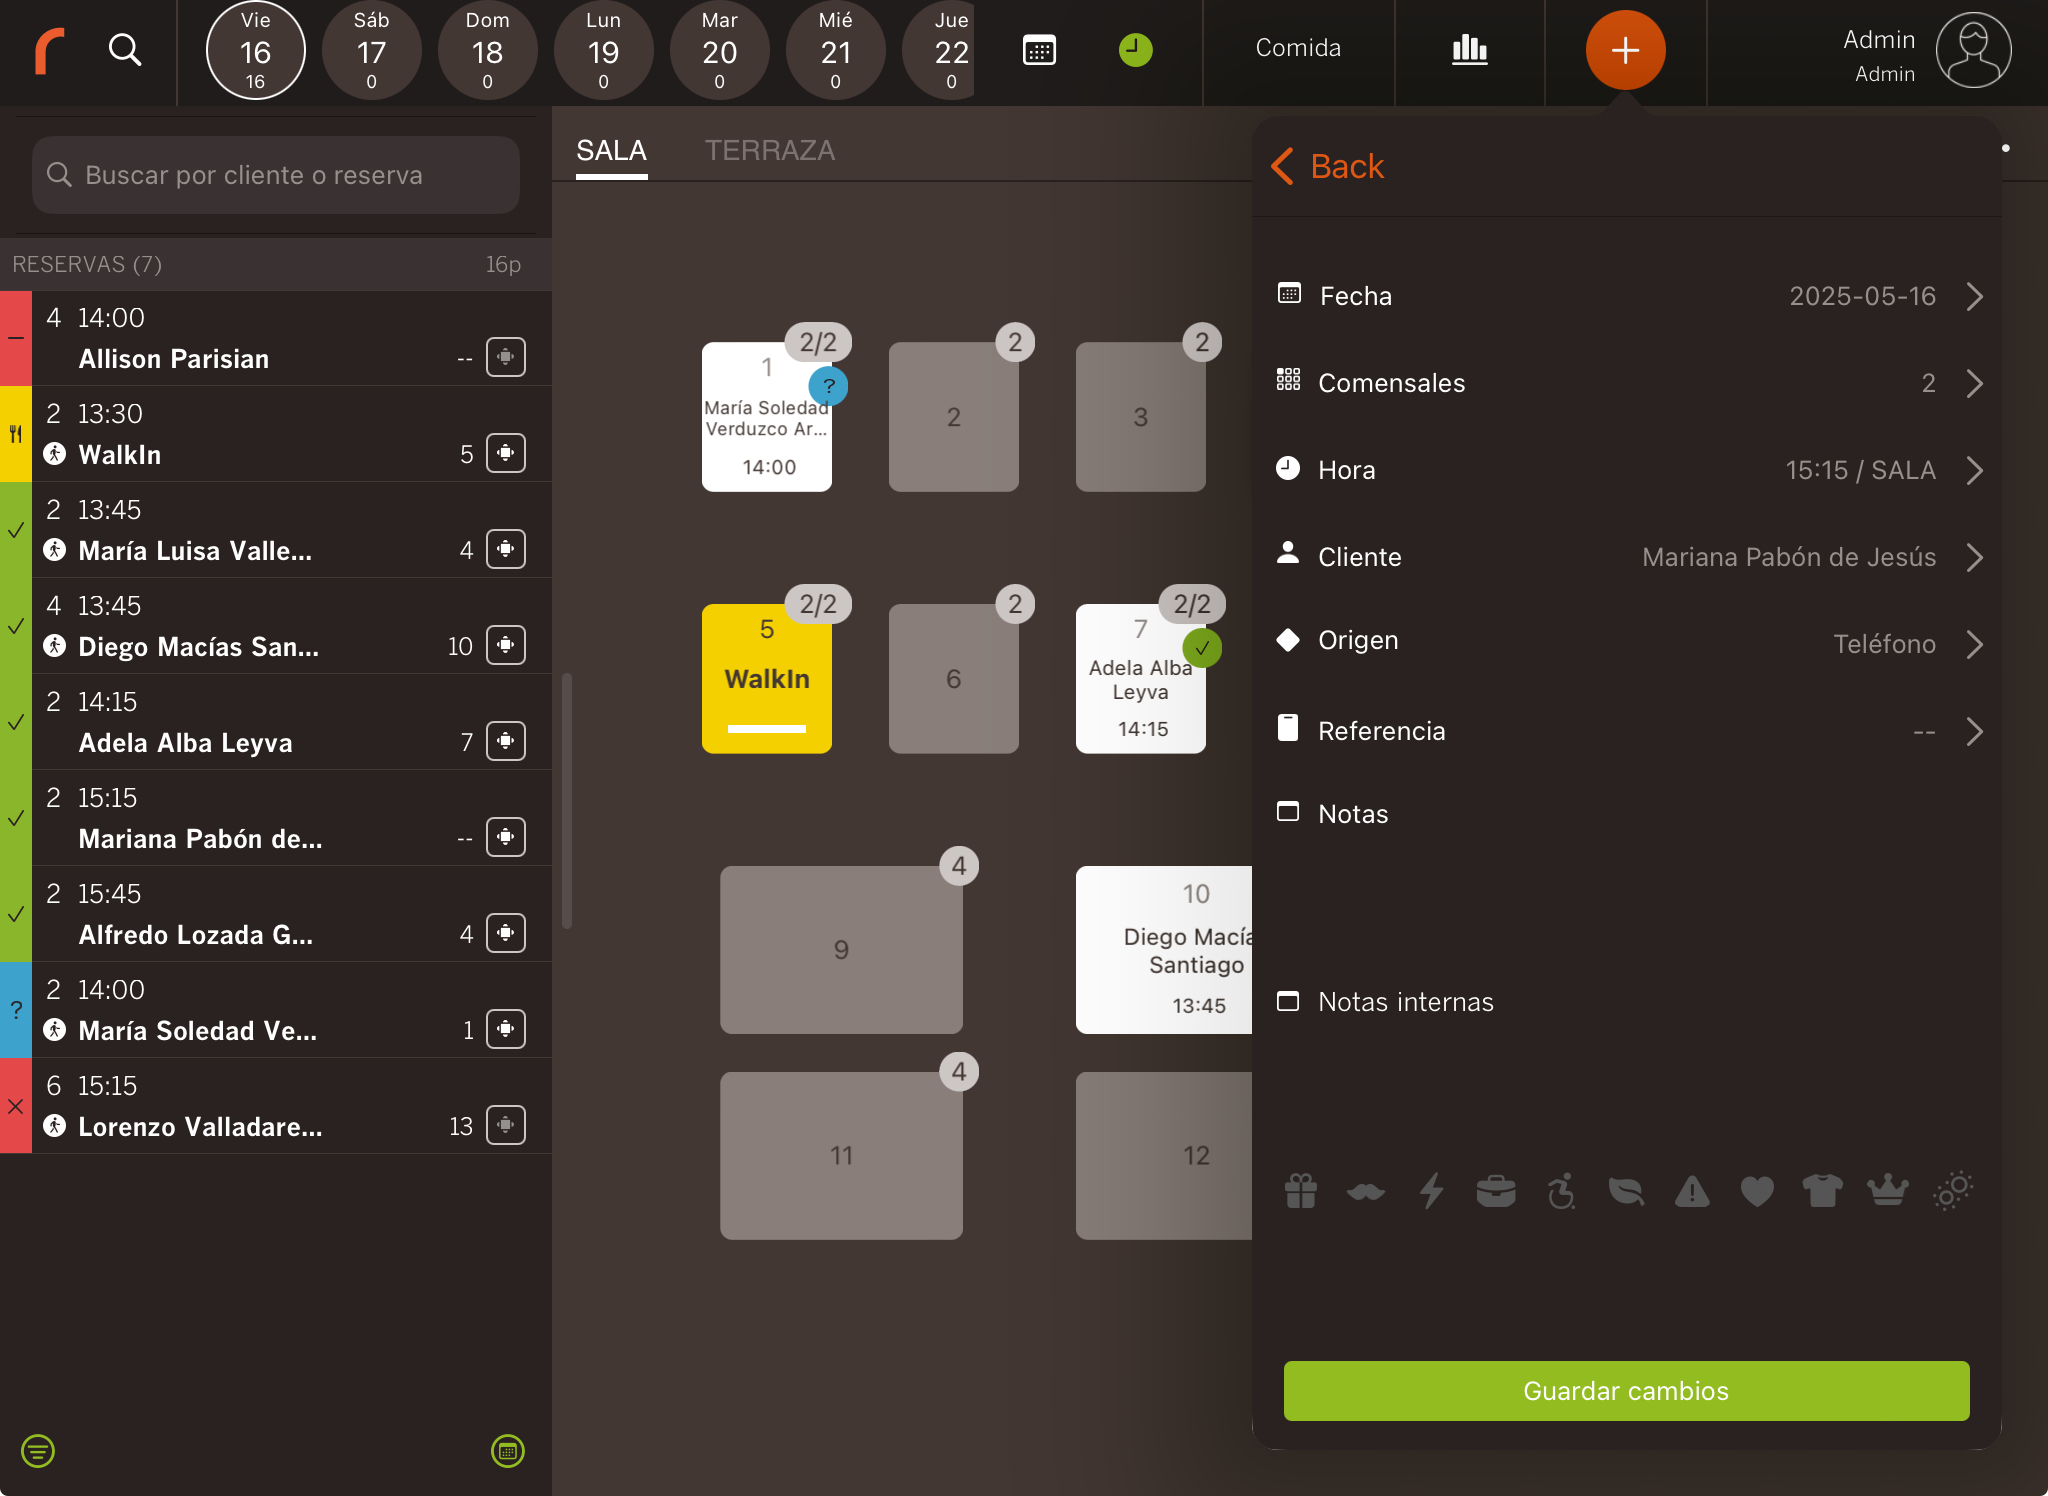
If you want to add more information to the reservation, tap Save with more options. You’ll see the following screen:
-
Status: Choose the reservation status: Pending or Confirmed.
You can set up in the back office whether the customer will receive the details by email, and if they can confirm or cancel the booking. More information here.
-
: Add products to the booking. More information here.
-
: Add a deposit if needed. More information here.
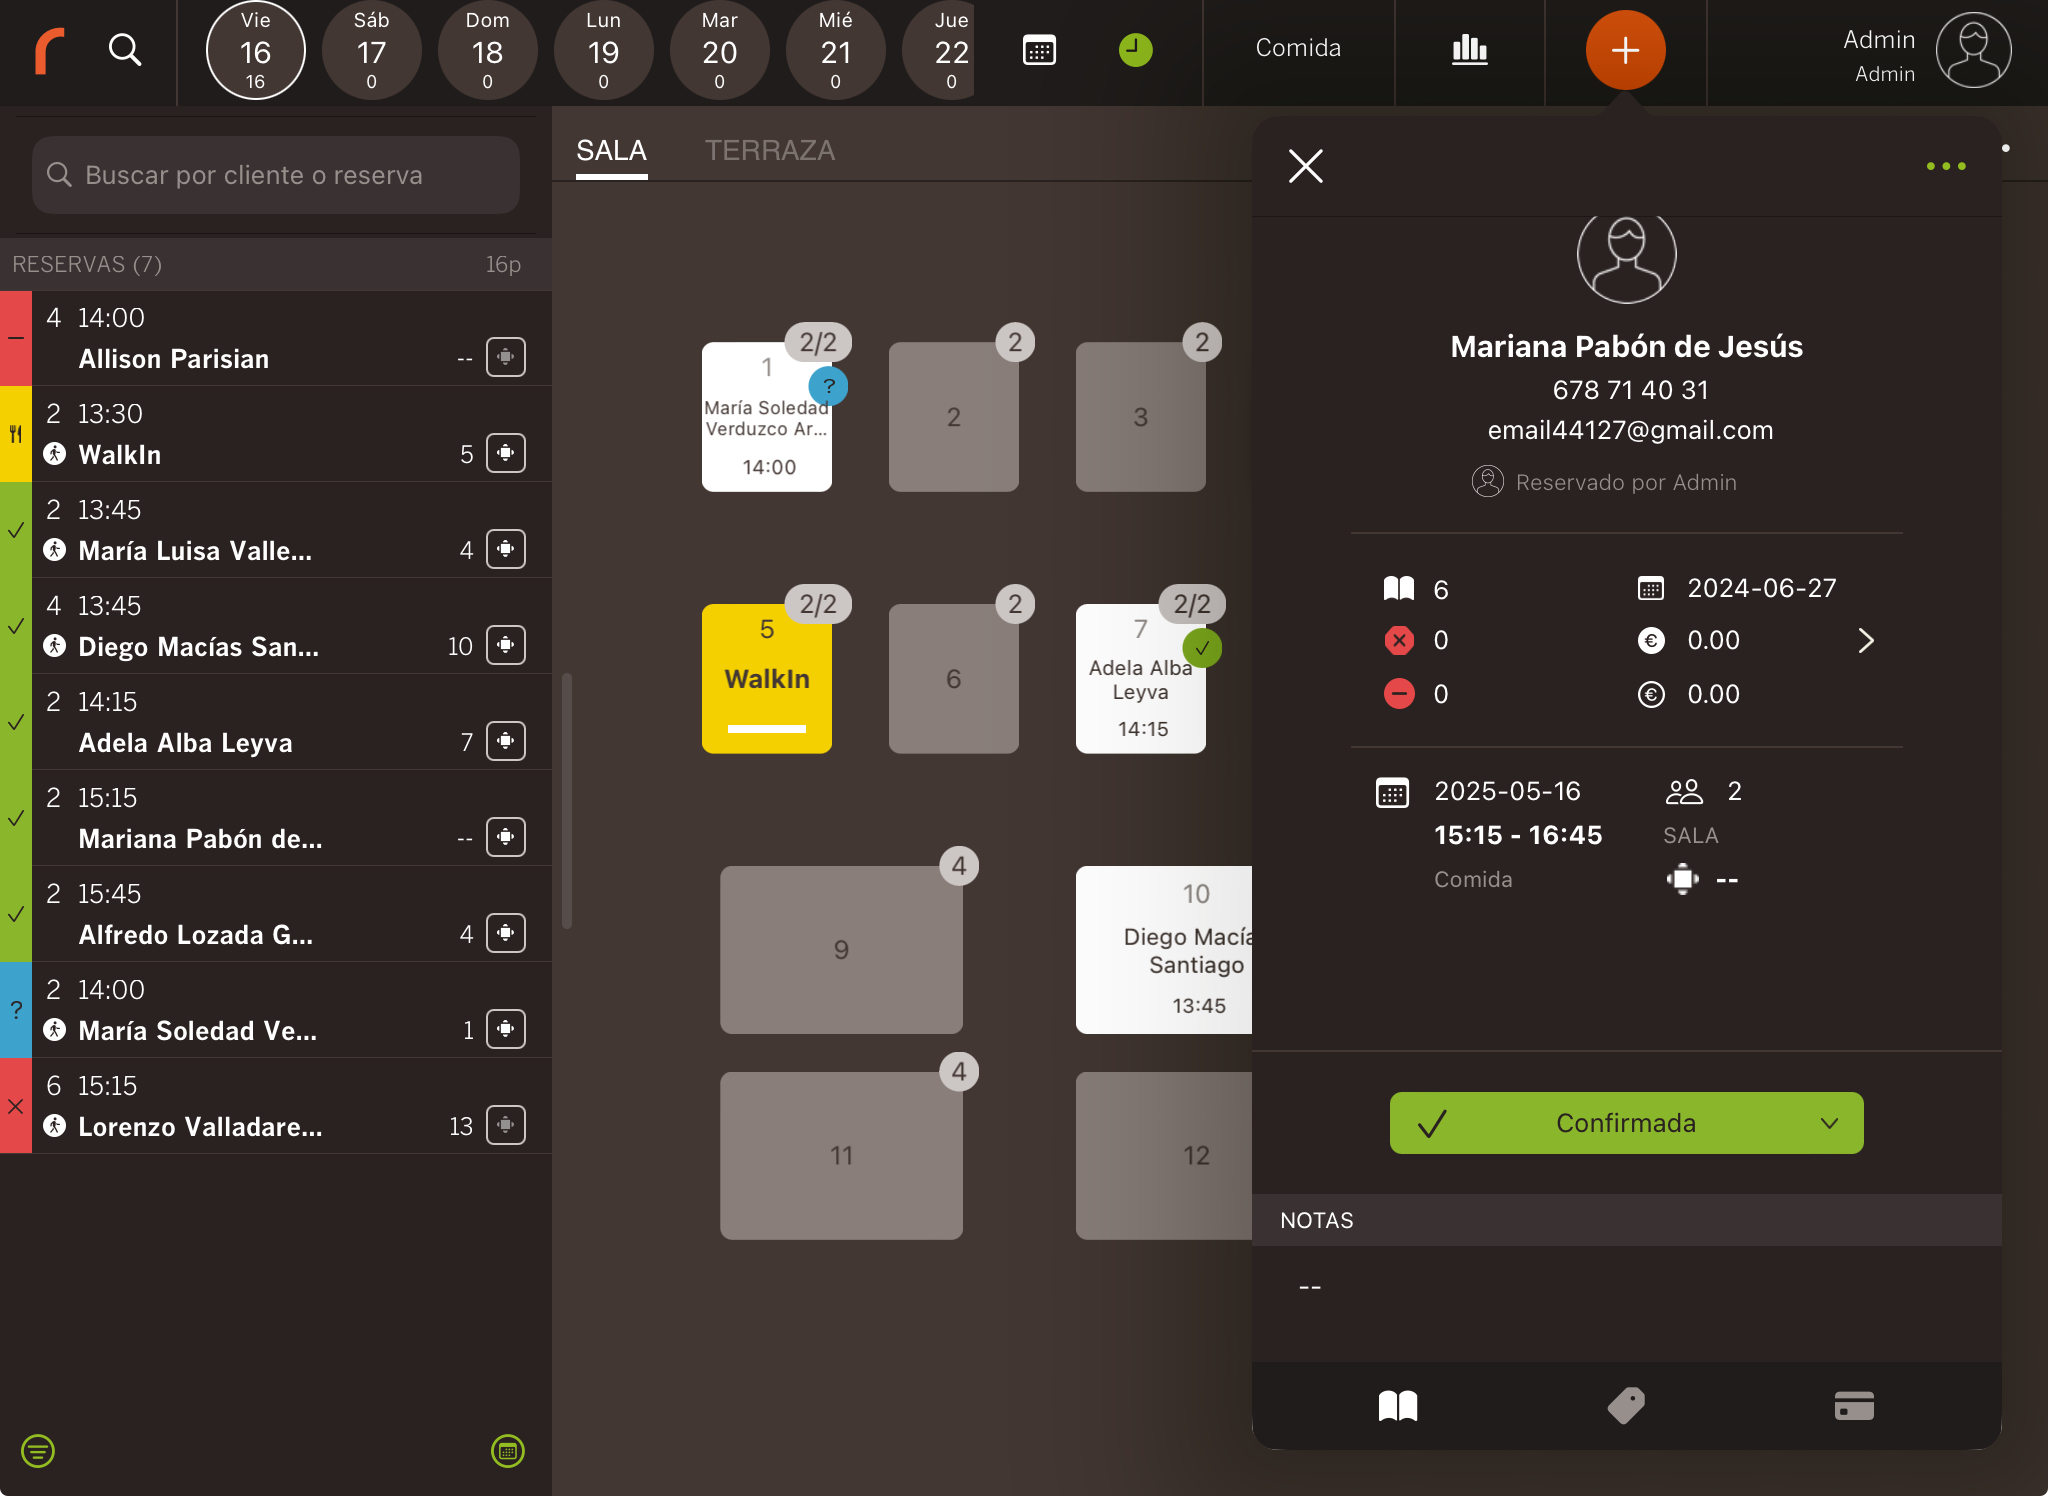
If you tap the in the top right corner, you can edit:
-
Date: Change the date.
-
Guests: Adjust the number of guests.
-
Time: Change the time and the room.
-
Customer: Change the customer.
-
Source: Select the reservation source. Example: phone, website, widget. More information here.
-
Reference: Add a reference if necessary. Example: agency or hotel that made the reservation. More information here.
These fields aren’t mandatory, so you can leave them blank if they aren’t relevant.
-
Notes: Write down any requests from the customer. Example: the customer wants a table with a sea view.
-
Internal notes: Notes that the customer won’t see. Example: the customer didn’t show up.
-
Tags: Use tags to add visual information. Example: VIP customer or customer with limited mobility.
When you’re finished, click Save changes or Back to cancel and exit the booking window.
If a customer wants a specific table, you can make the reservation directly from the table by swiping down and tapping New reservation.